OpenStack Infrastructure Setup Guide
Step 1: Download OpenVPN Profile
- Go to join.hackucf.org.
- Click on "My Membership" and login with your Discord credentials.
- Download the OpenVPN profile provided and save it for later use.
Step 2: Install OpenVPN Client
- Go to https://openvpn.net/client/.
- Download the appropriate version of OpenVPN for your operating system and install it.
For Windows:
- Press the Windows key and search for OpenVPN.
- Run OpenVPN.
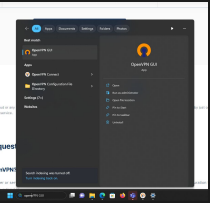
- On the bottom right of your screen, open the overflow icon menu.
- Right-click on the OpenVPN icon and select "Import Profile".
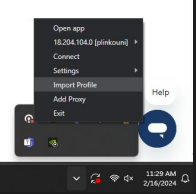
- Click on the "UPLOAD FILE" tab.
- Press "Browse" and navigate to where you downloaded the HackUCF OpenVPN profile.
- Select the profile and press "Open".
- Press "Connect".
- In the future, navigate to the OpenVPN client and select the on switch labeled "vpn.hackucf.org".
For Windows 10 Users:
Step 3: Create SSH Key
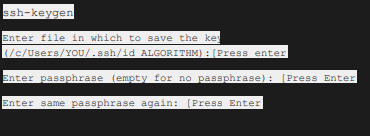
- Open a terminal.
- Run
ssh-keygen -t rsa.
- Press Enter to save the key in the default location.
- Press Enter for an empty passphrase.
- Press Enter again to confirm.
Step 4: Login With Keycloak
- Navigate to https://horizon.hackucf.cloud
- Select login with Hack@UCF SSO

- (These other steps are just for the first time)
- Login with credentials emailed or dm by Hack@UCF bot
- Agree to TOS
- Change Password
- Confirm Email
Step 5: Horizon.hackucf.cloud Configuration
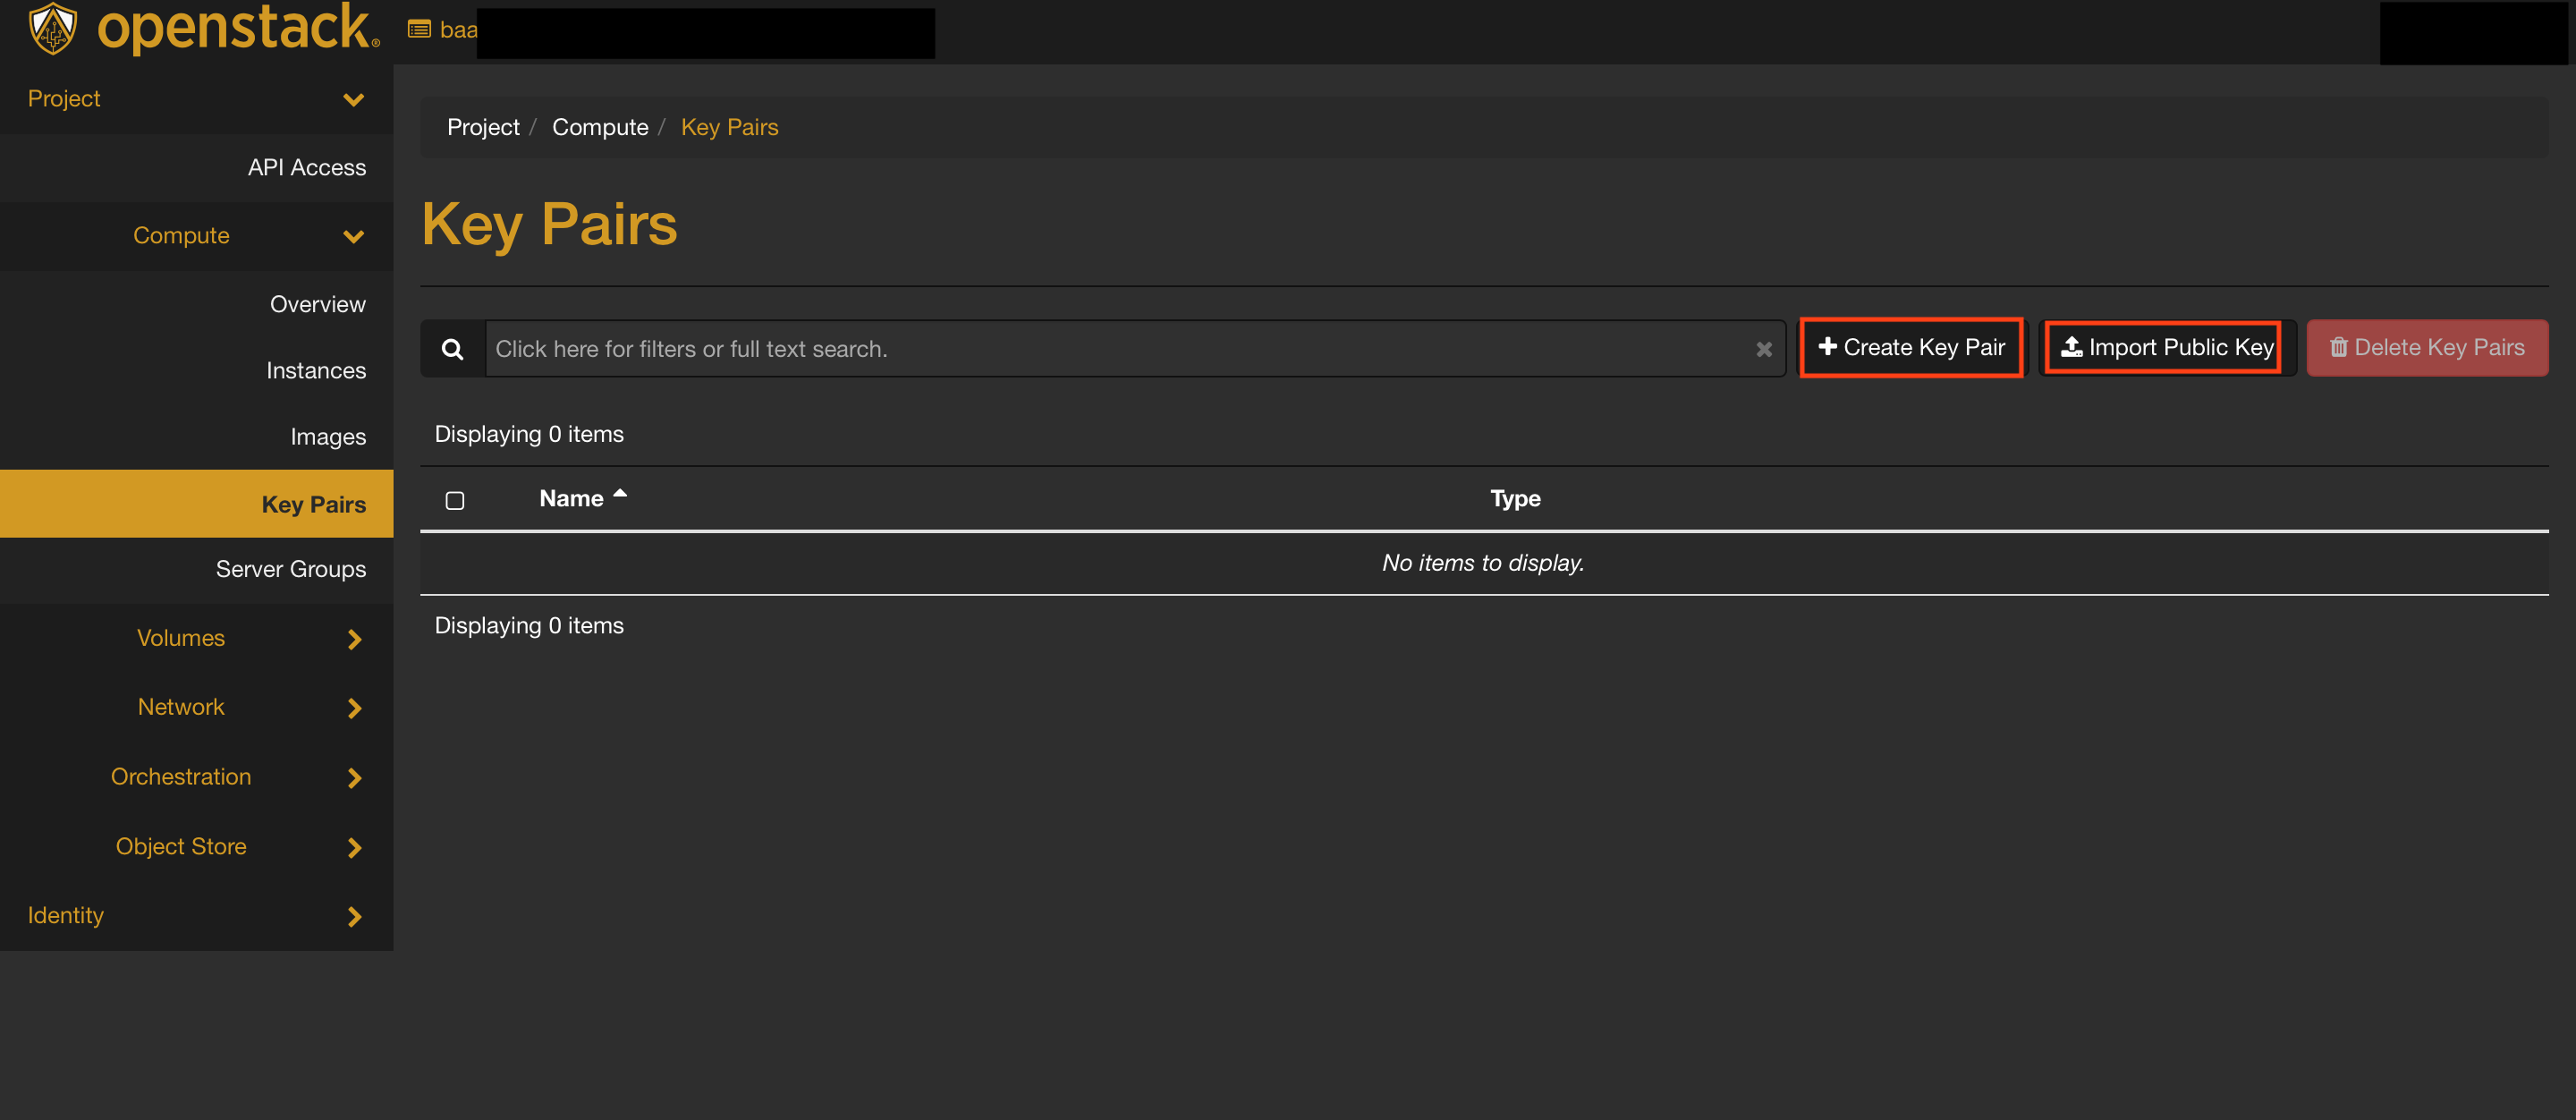
- In OpenStack, navigate to "Compute" -> "Key Pairs".
- Click "Import Public Key".
- Name it something reasonable.
- Set "Key Type" to "SSH Key".
- Paste the contents of your id_rsa.pub file here, or use "Load Public Key from a file" to upload it.
Next Steps