How to access Windows Instances on Openstack
There are 2 main ways to get access and control a Windows Instance on Openstack. This tutorial will cover both methods.
Prerequesites
- A newly created Windows Server Instance on Openstack
- Access to Infra via OpenVPN OR On the Cyberlab Secure Network
Preparation: Recover your Windows Instance Password
For some windows instance images, you will need to retrieve the password so you can set a new administrator password. You will only be able to retrive the password if the instance was created with an SSH key and you have the private key.
The key needs to be an ssh-rsa key
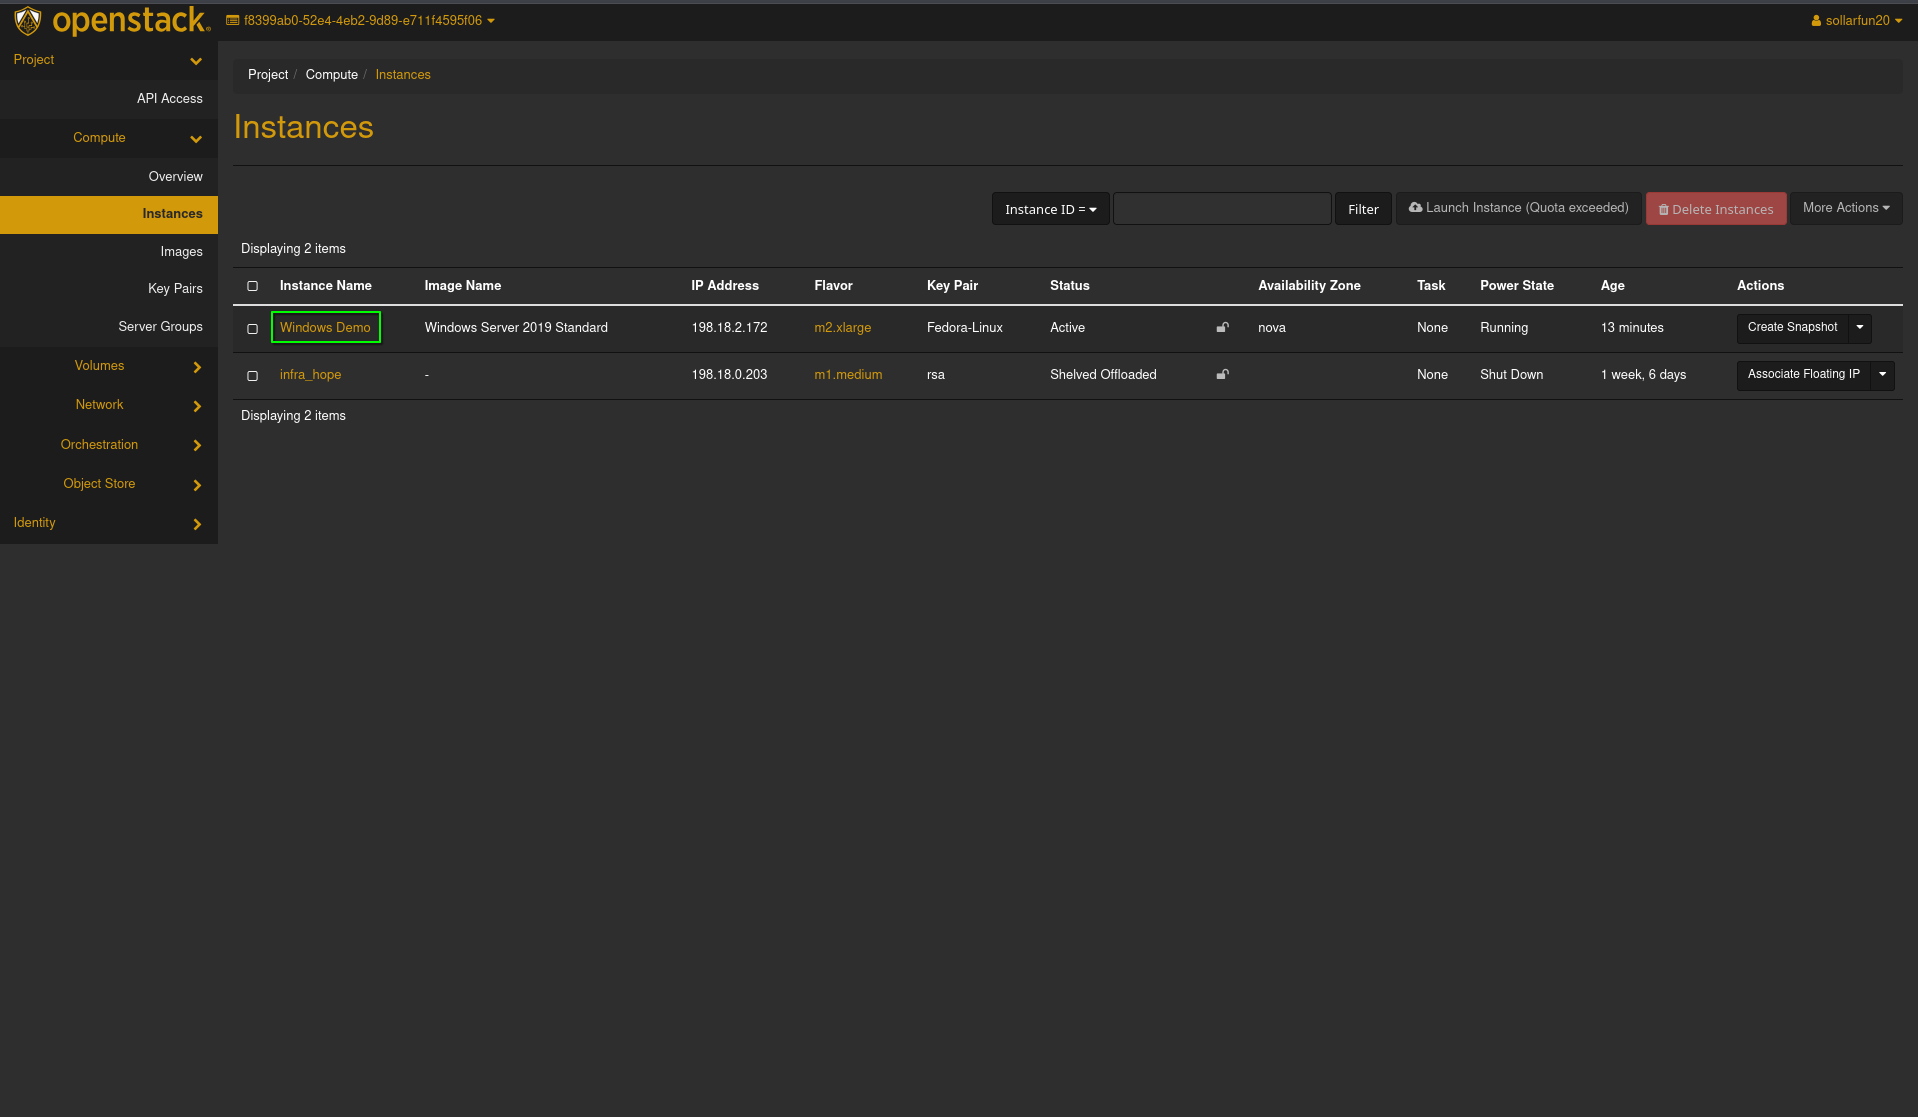
- Step 1: Access intance (use images from repo)
- On the left pane, choose
Computeand thenInstances.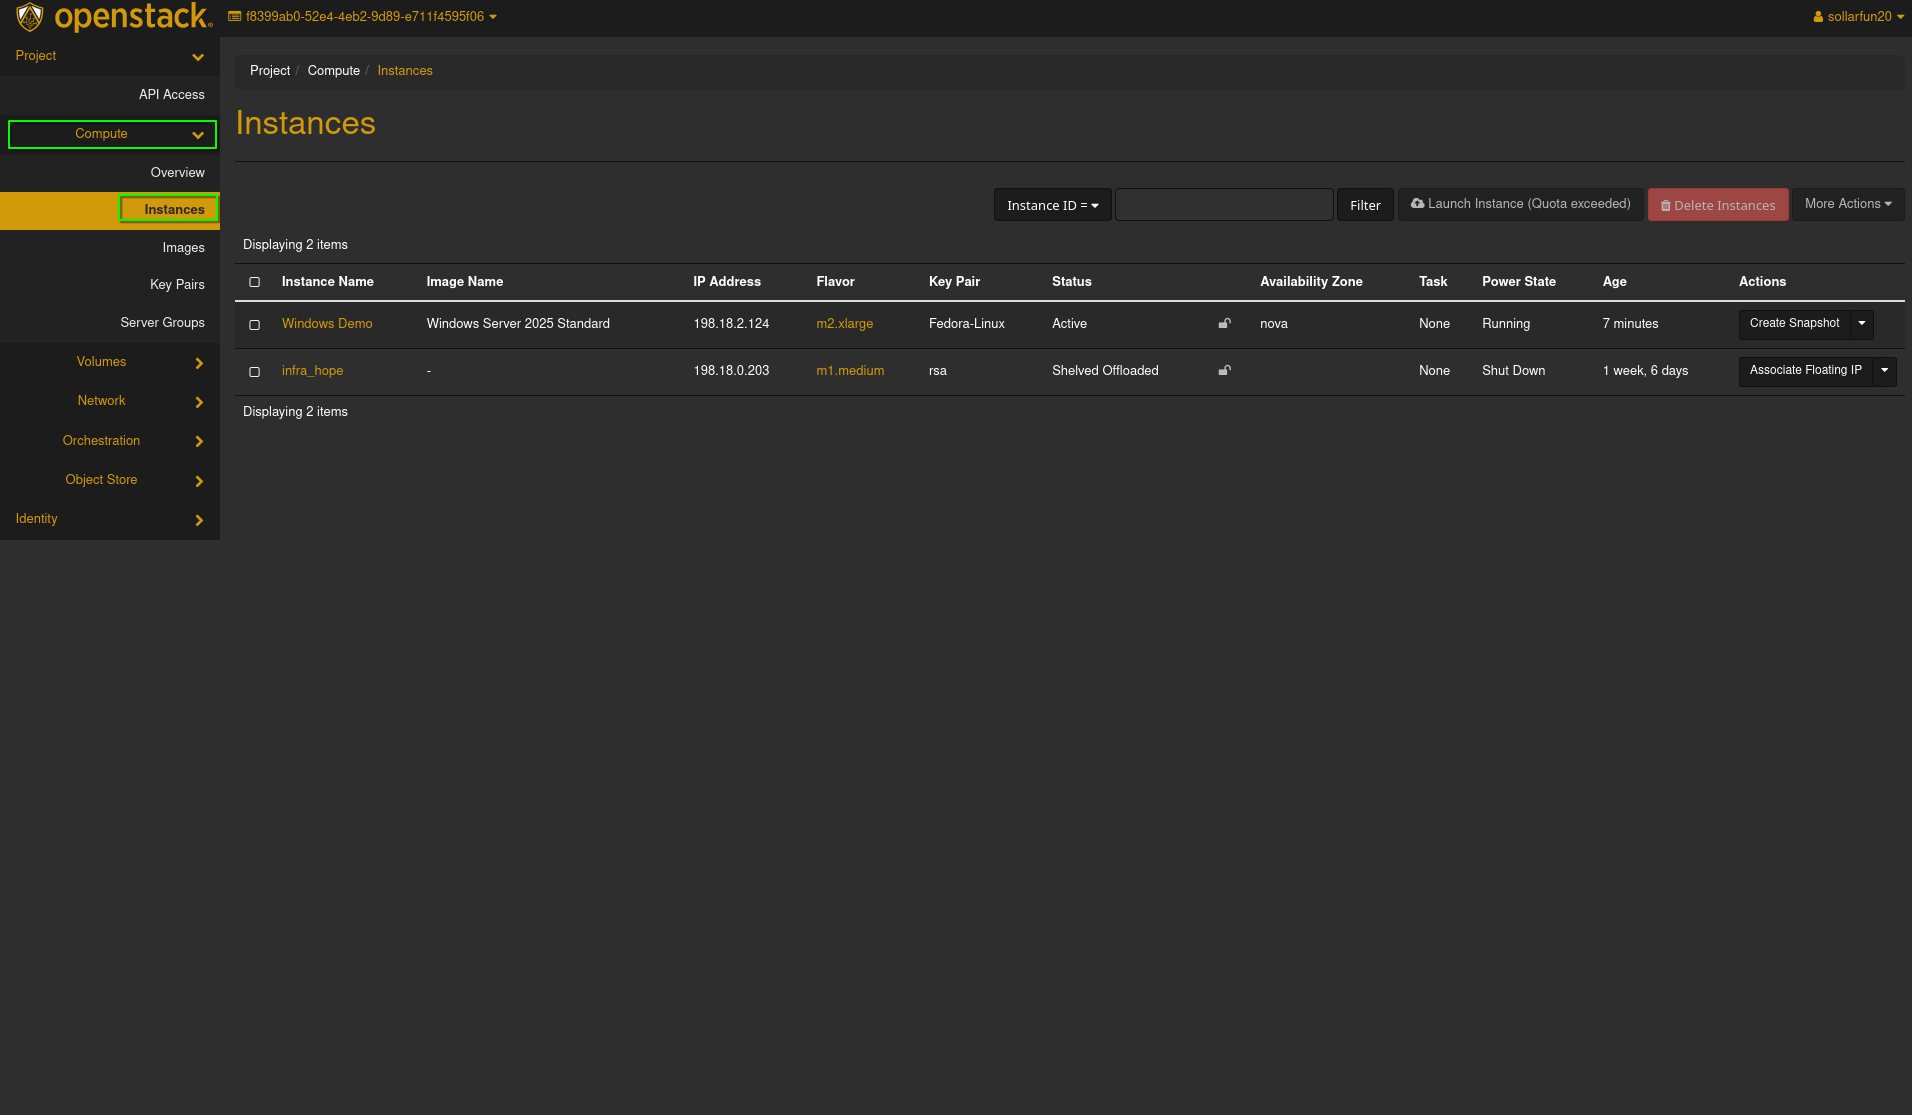
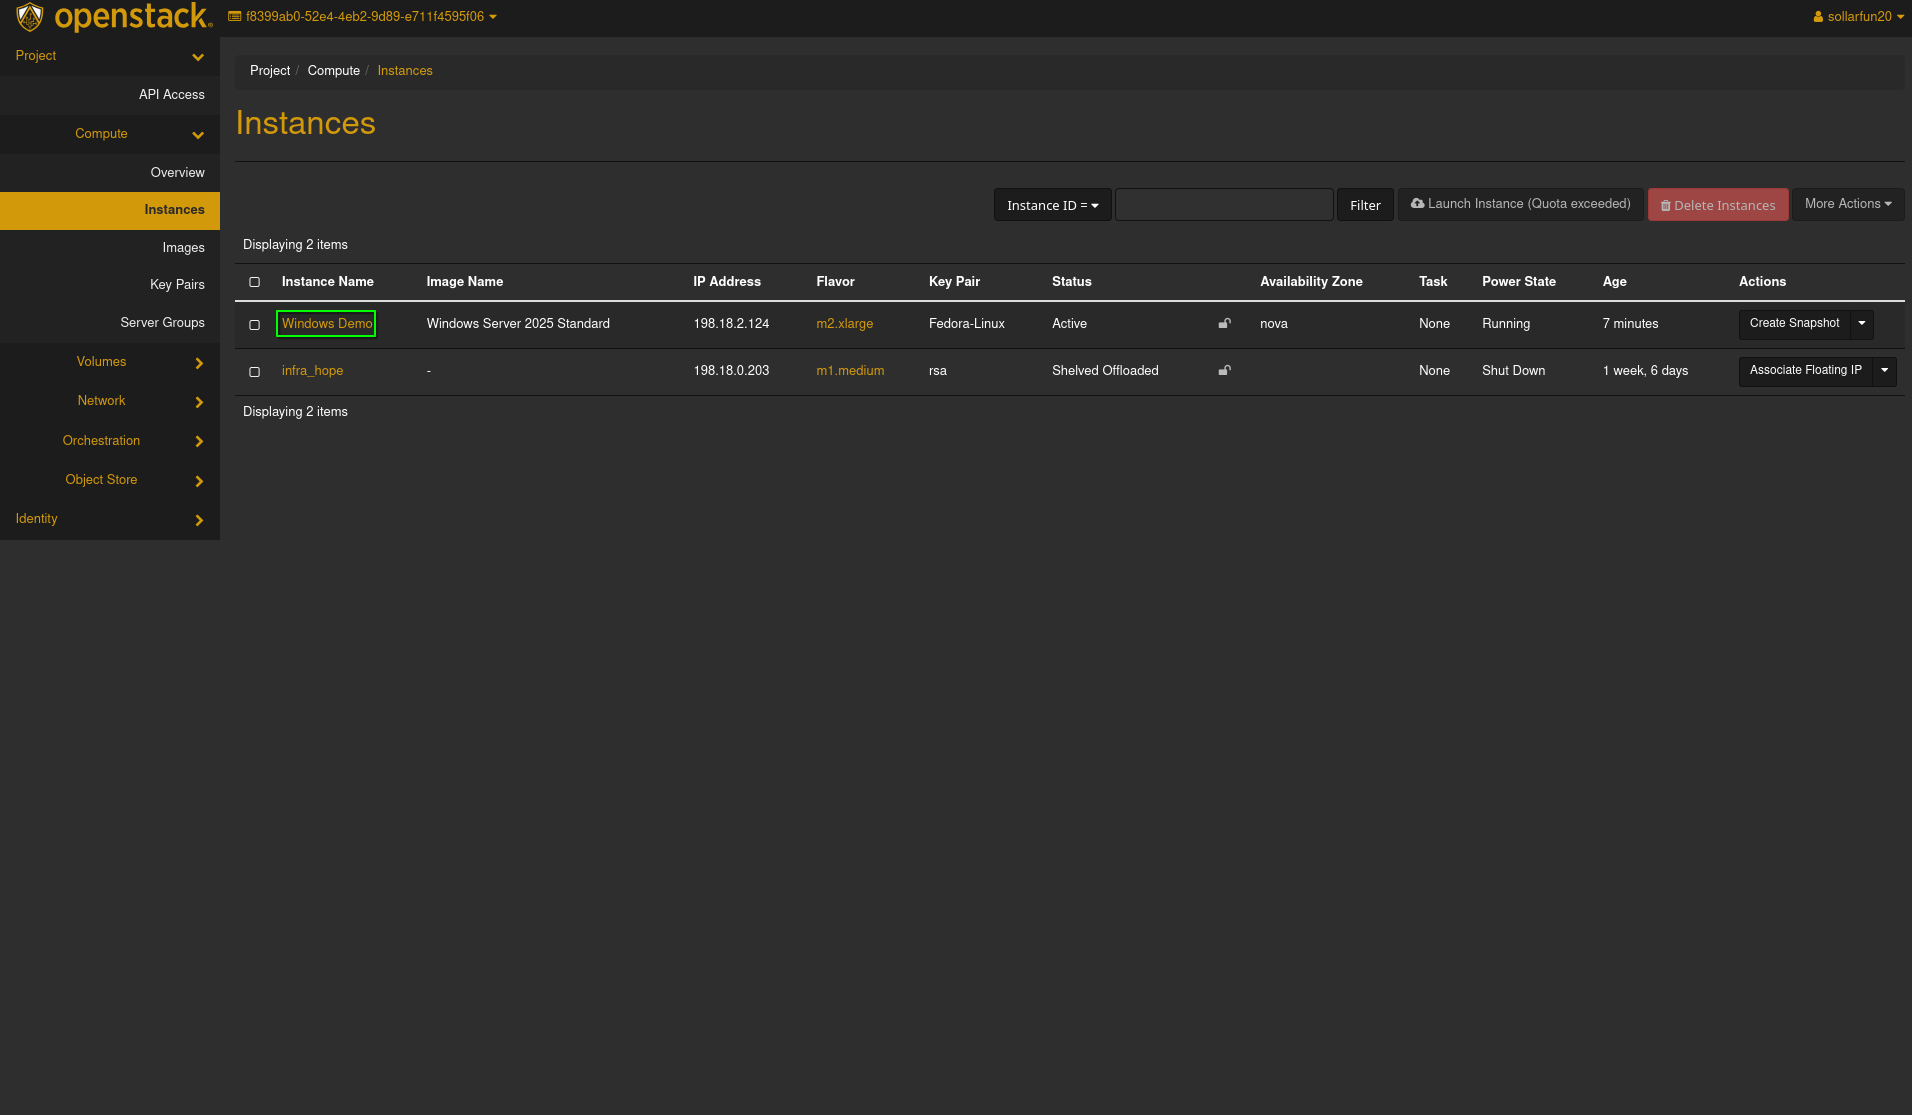
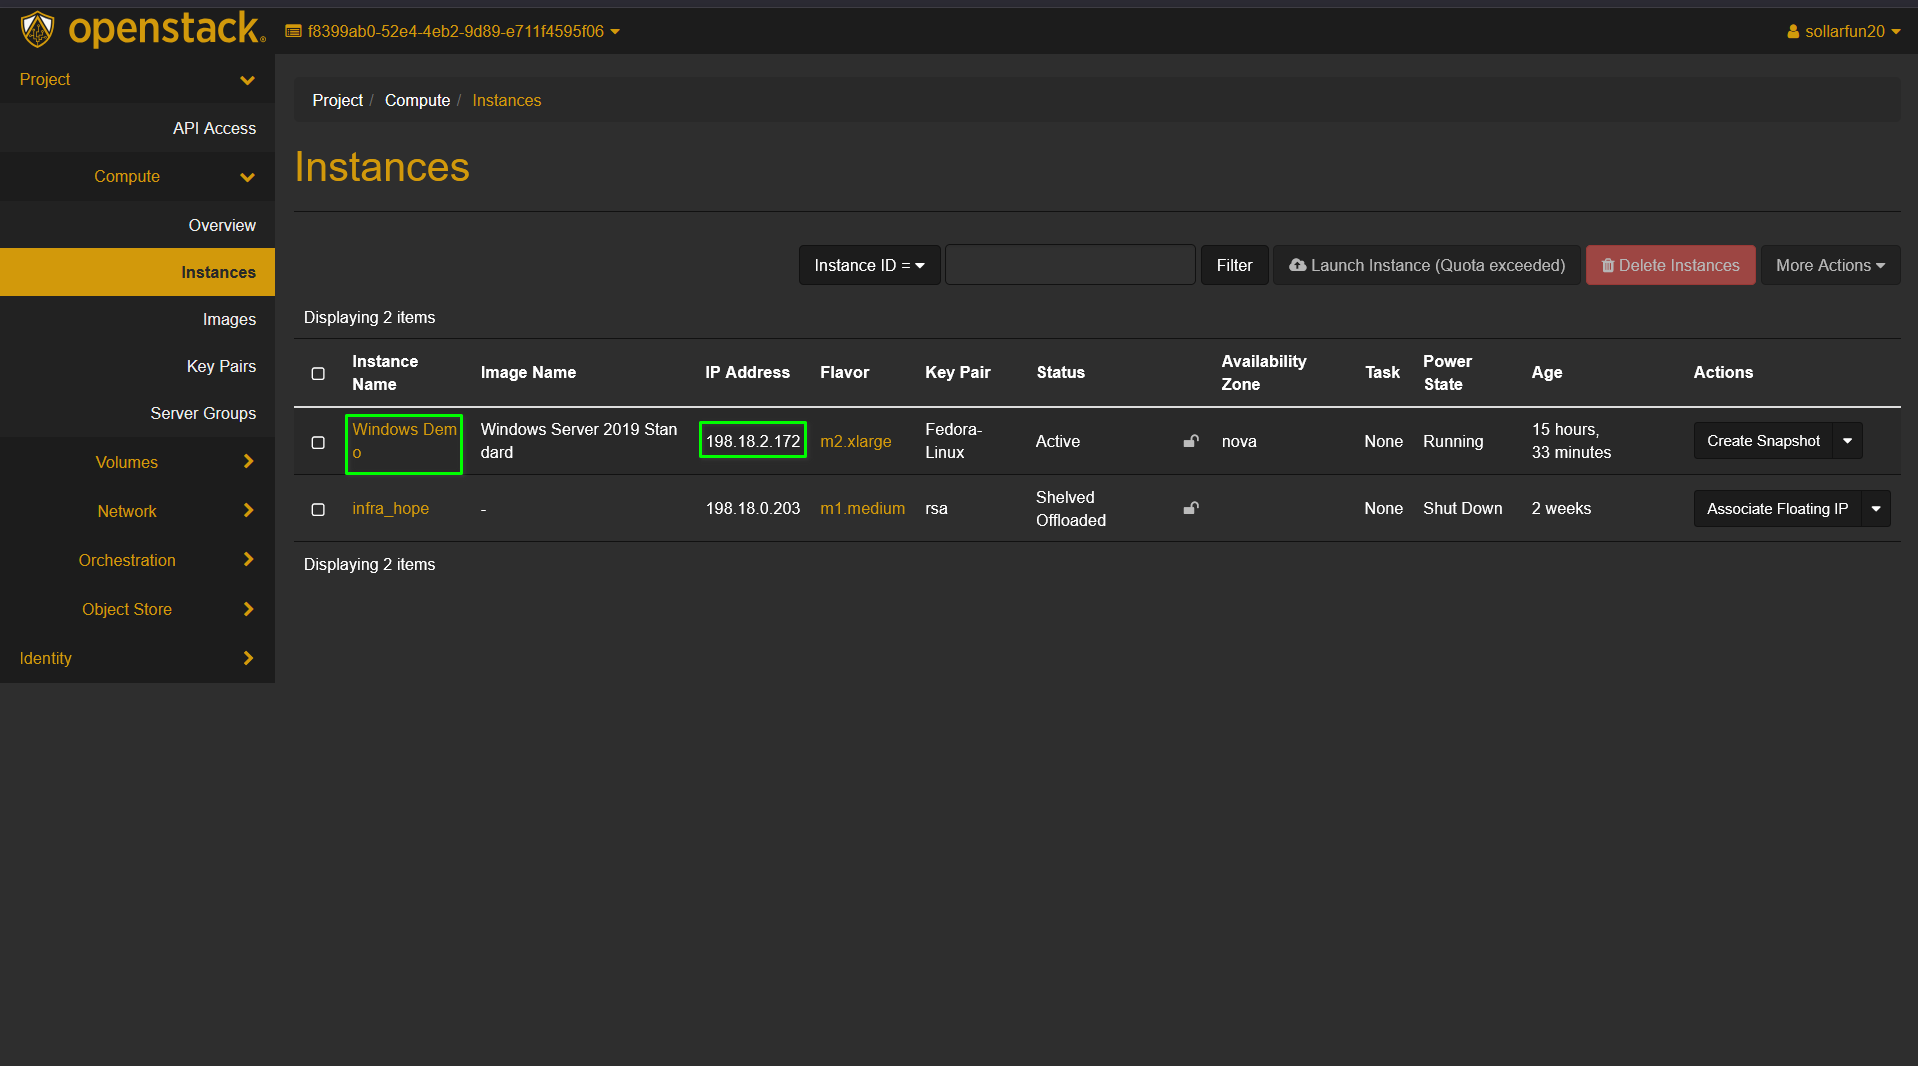
- Locate the instance you want to retrive the password from
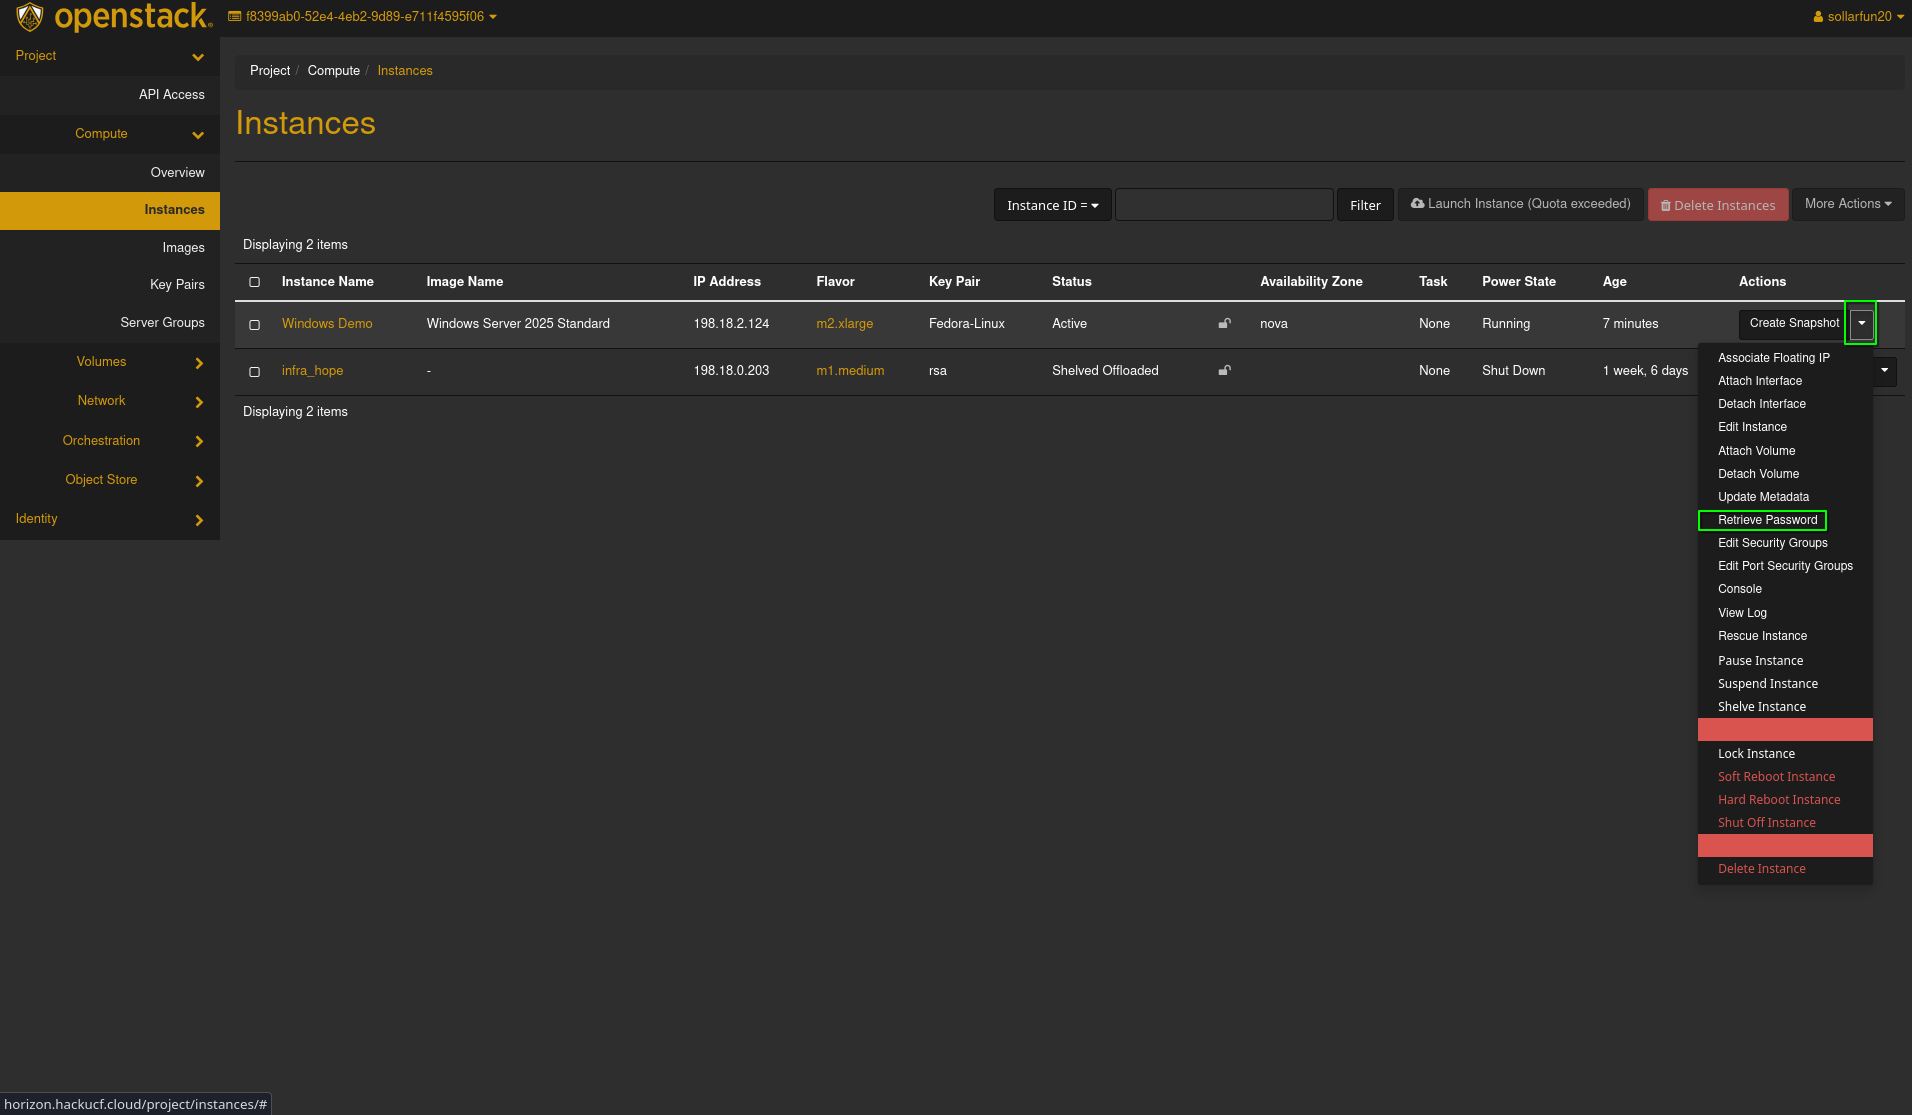
- Click on the downwards arrow under the action column of you instance and click on "Retrive Password"
- Now you will upload your private key from the SSH key pair utilized to create the instance. (You can also copy the key into the text box)

- Click on "Decrypt Password" and you should see the password.

- On the left pane, choose
Setting a new password
There are 2 different ways to set a password on your windows instance. For some instances you will be asked to set a new password and for others you will need to retrieve the password first.
Windows instances: New password automatically
- Windows 2025
- Windows 2022
- Windows 2019
- Windows 2012
- Windows 2008
Windows instances: Retrieval needed
- Windows 11
- Windows 10
- Windows 8.1
- Windows 7
New password automatically:
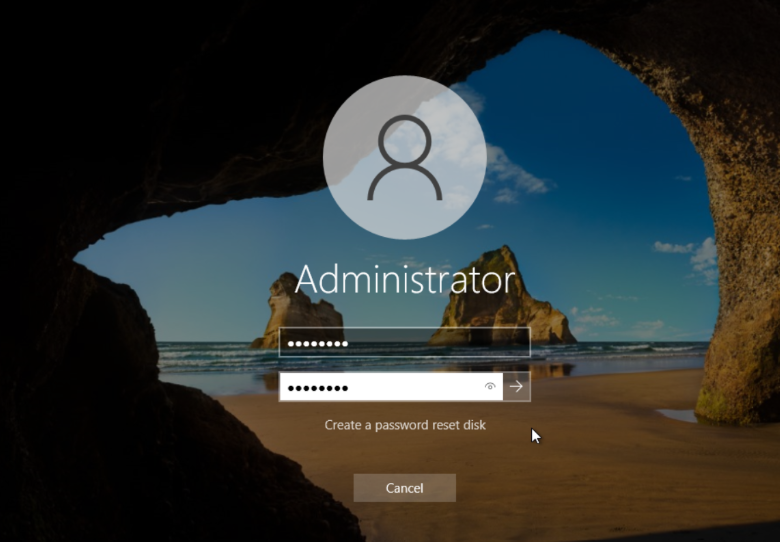
Head over to the console and send a ctrl+alt+delete to the server by pressing the Send CtrlAltDelete button in the upper right hand corner.The Console will receive you with a message “The user's password must be changed before signing in”.
- Click on OK
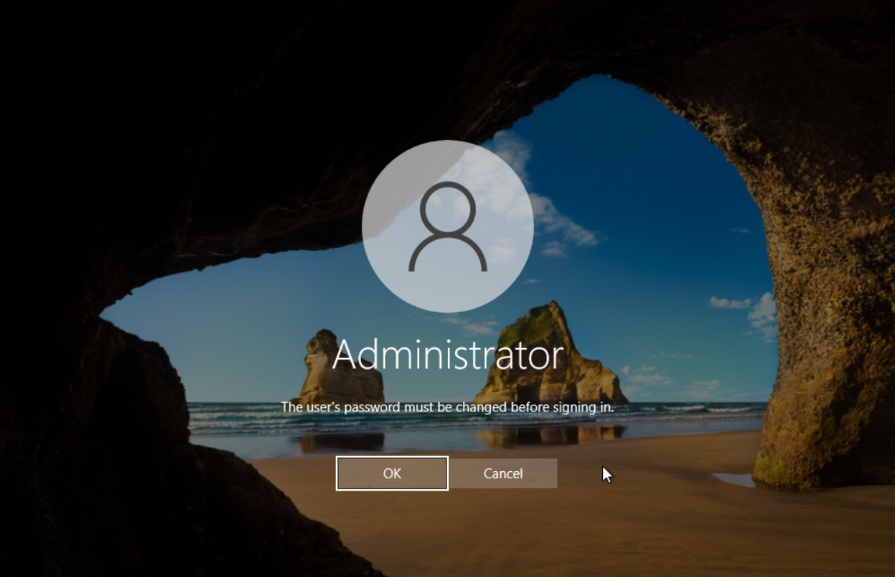
- Set your new password and you will be done!
Retrieval needed: Please look at the retrieval guide at “Recover your Windows Instance Password
Once you have retrieved your password you may RDP into your virtual machine.
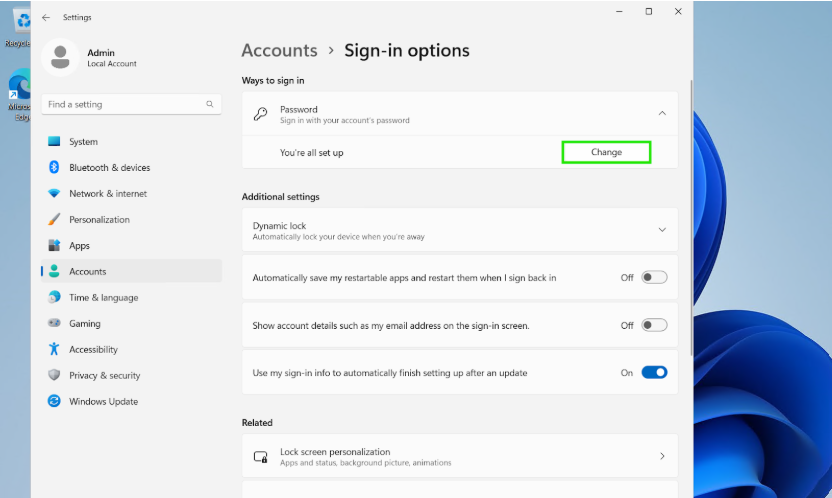
- You can go to Settings -> Change Password and then Click on Change
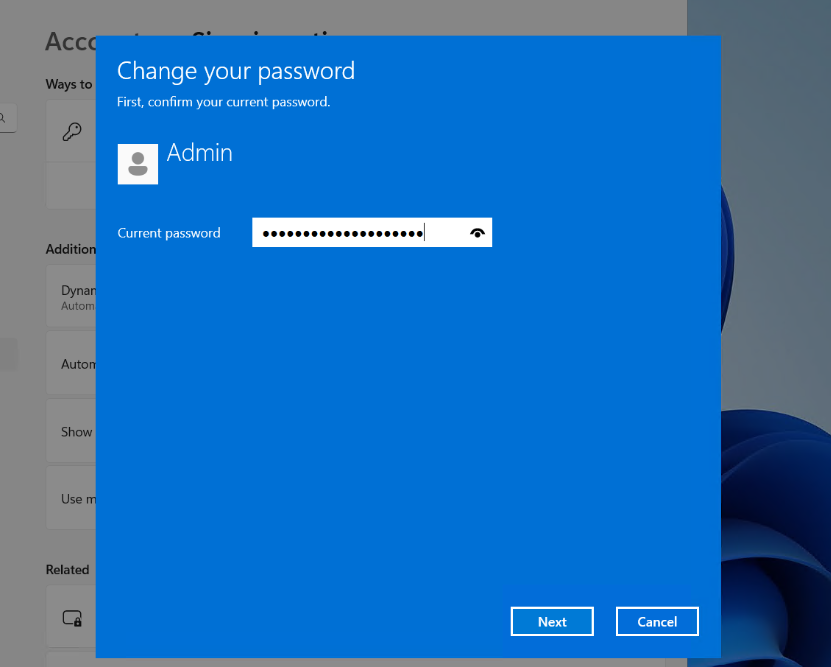
- You may enter the retrieved password
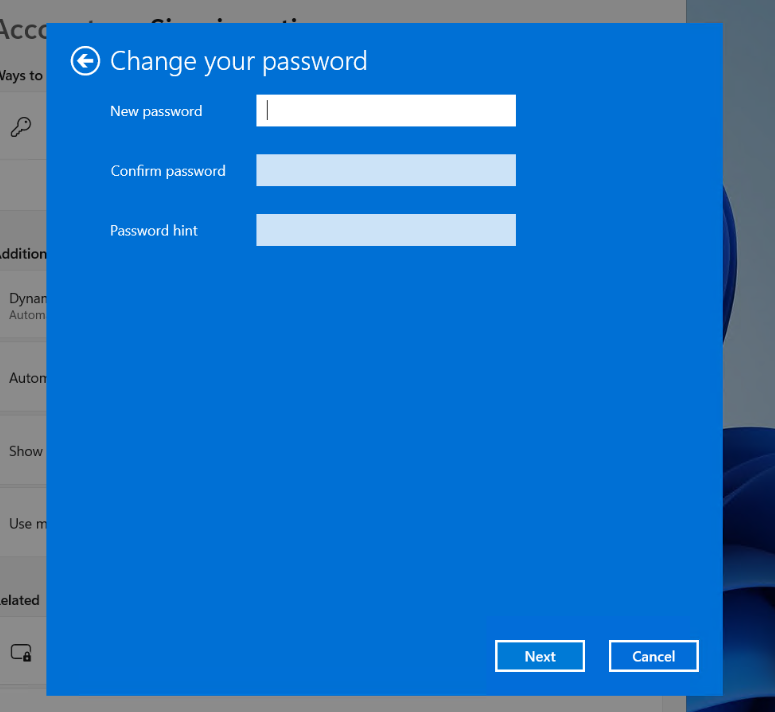
- Finally set your new password and don't forget to use it next time you sign in!
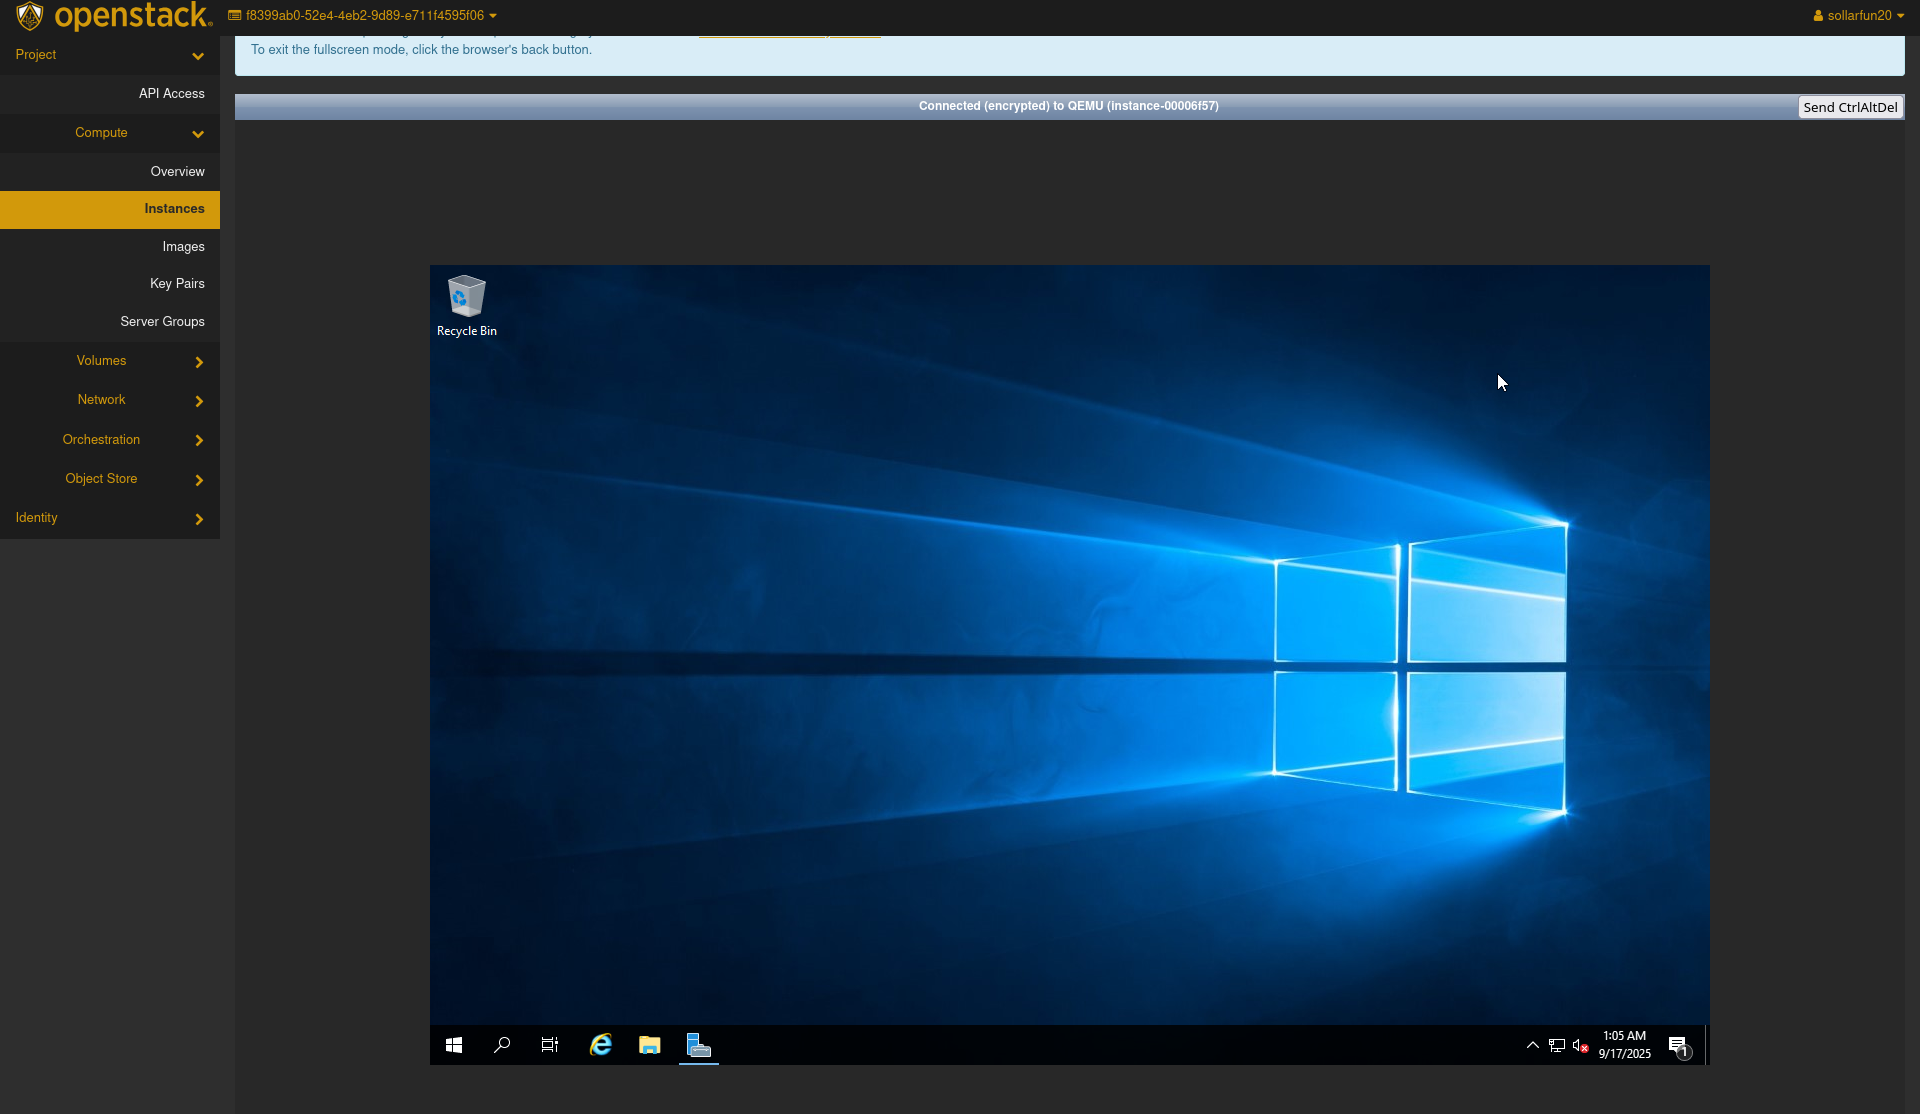
Method 1: Connect Using the Openstack Console (Must be used for initial Windows Setup)
Openstack has a built-in console viewer for Instances which allows you to get a true console view of the Instance allowing for easier debugging of the Instance. You will have to log in using this method to initially set up any new Windows Instance.
Steps:
- On the left plane, choose
Computeand thenInstances.
- Locate the instance you want to access the console of, and click on its name.
- Select the
Consoletab under the instance name.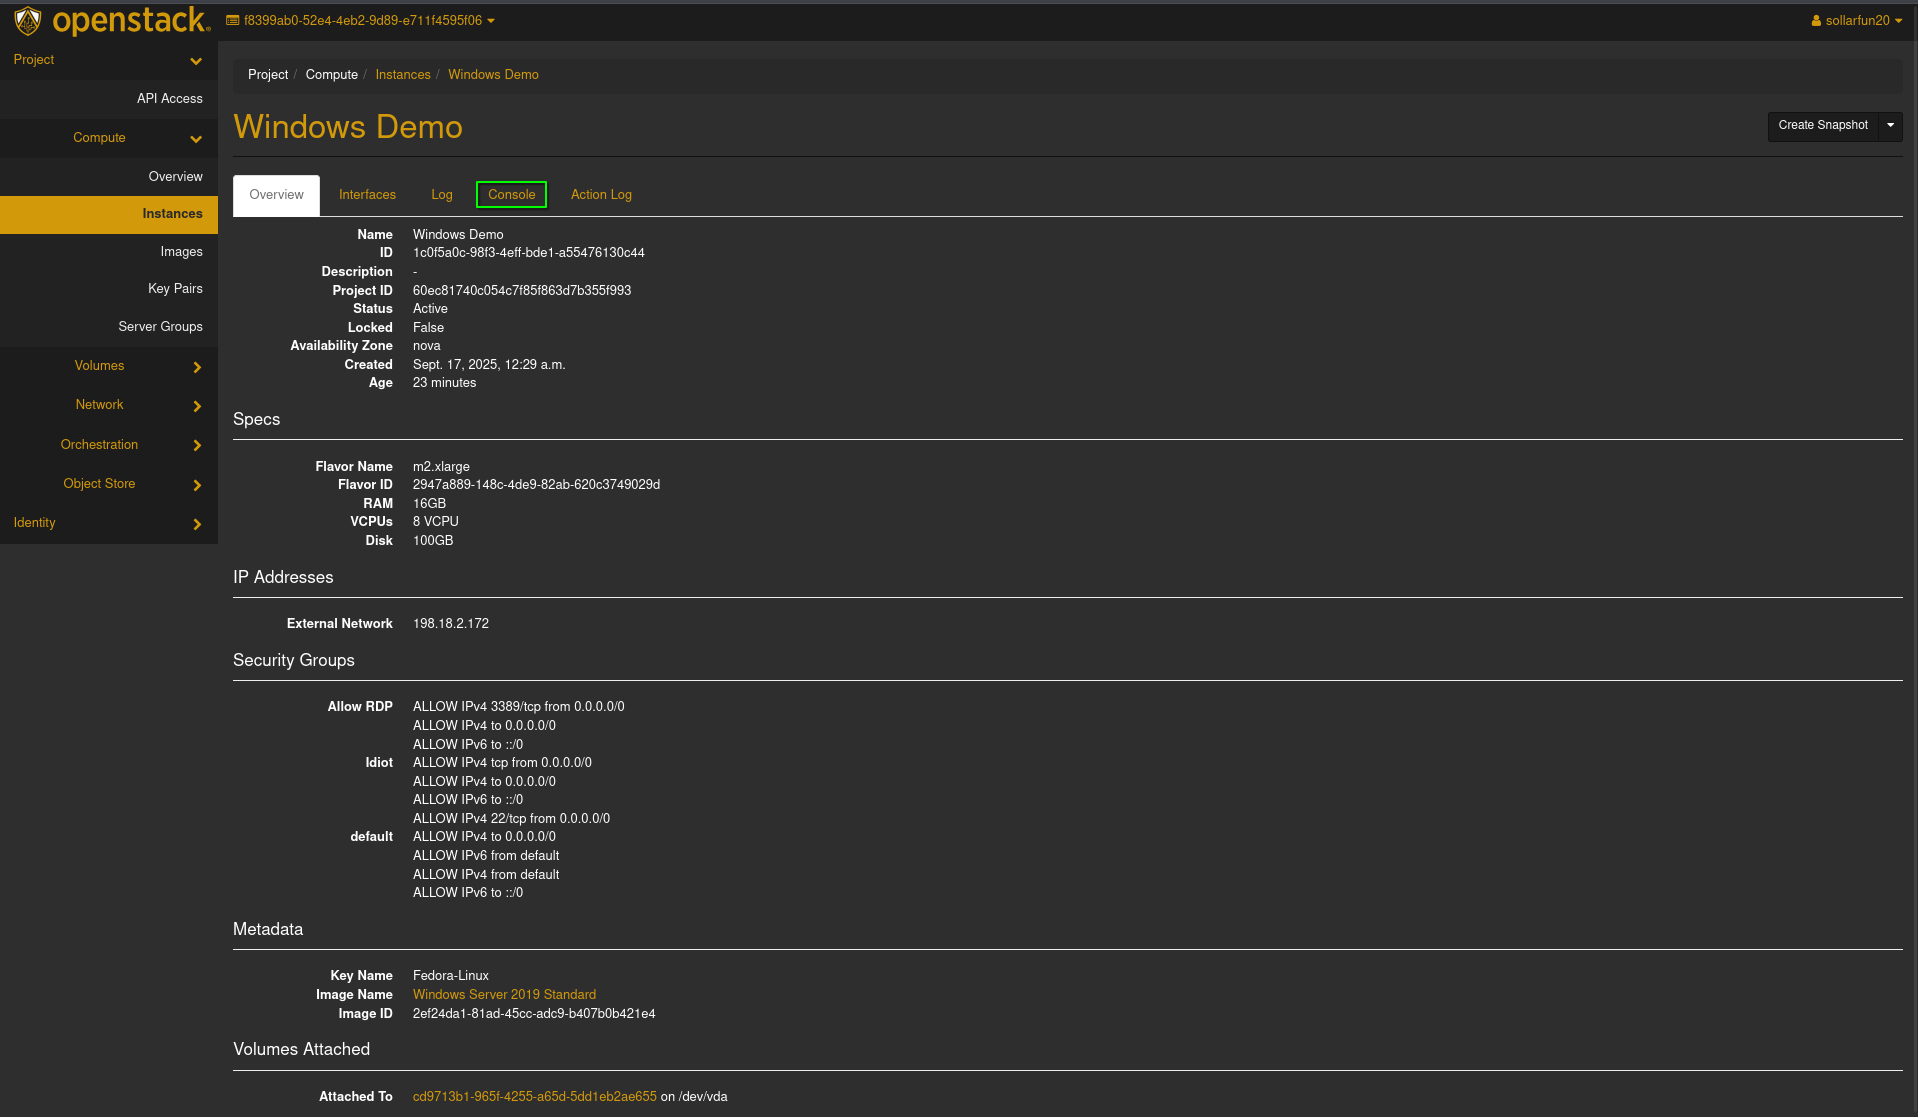
- Send a ctrl+alt+delete to the server by pressing the
Send CtrlAltDeletebutton in the upper right hand corner.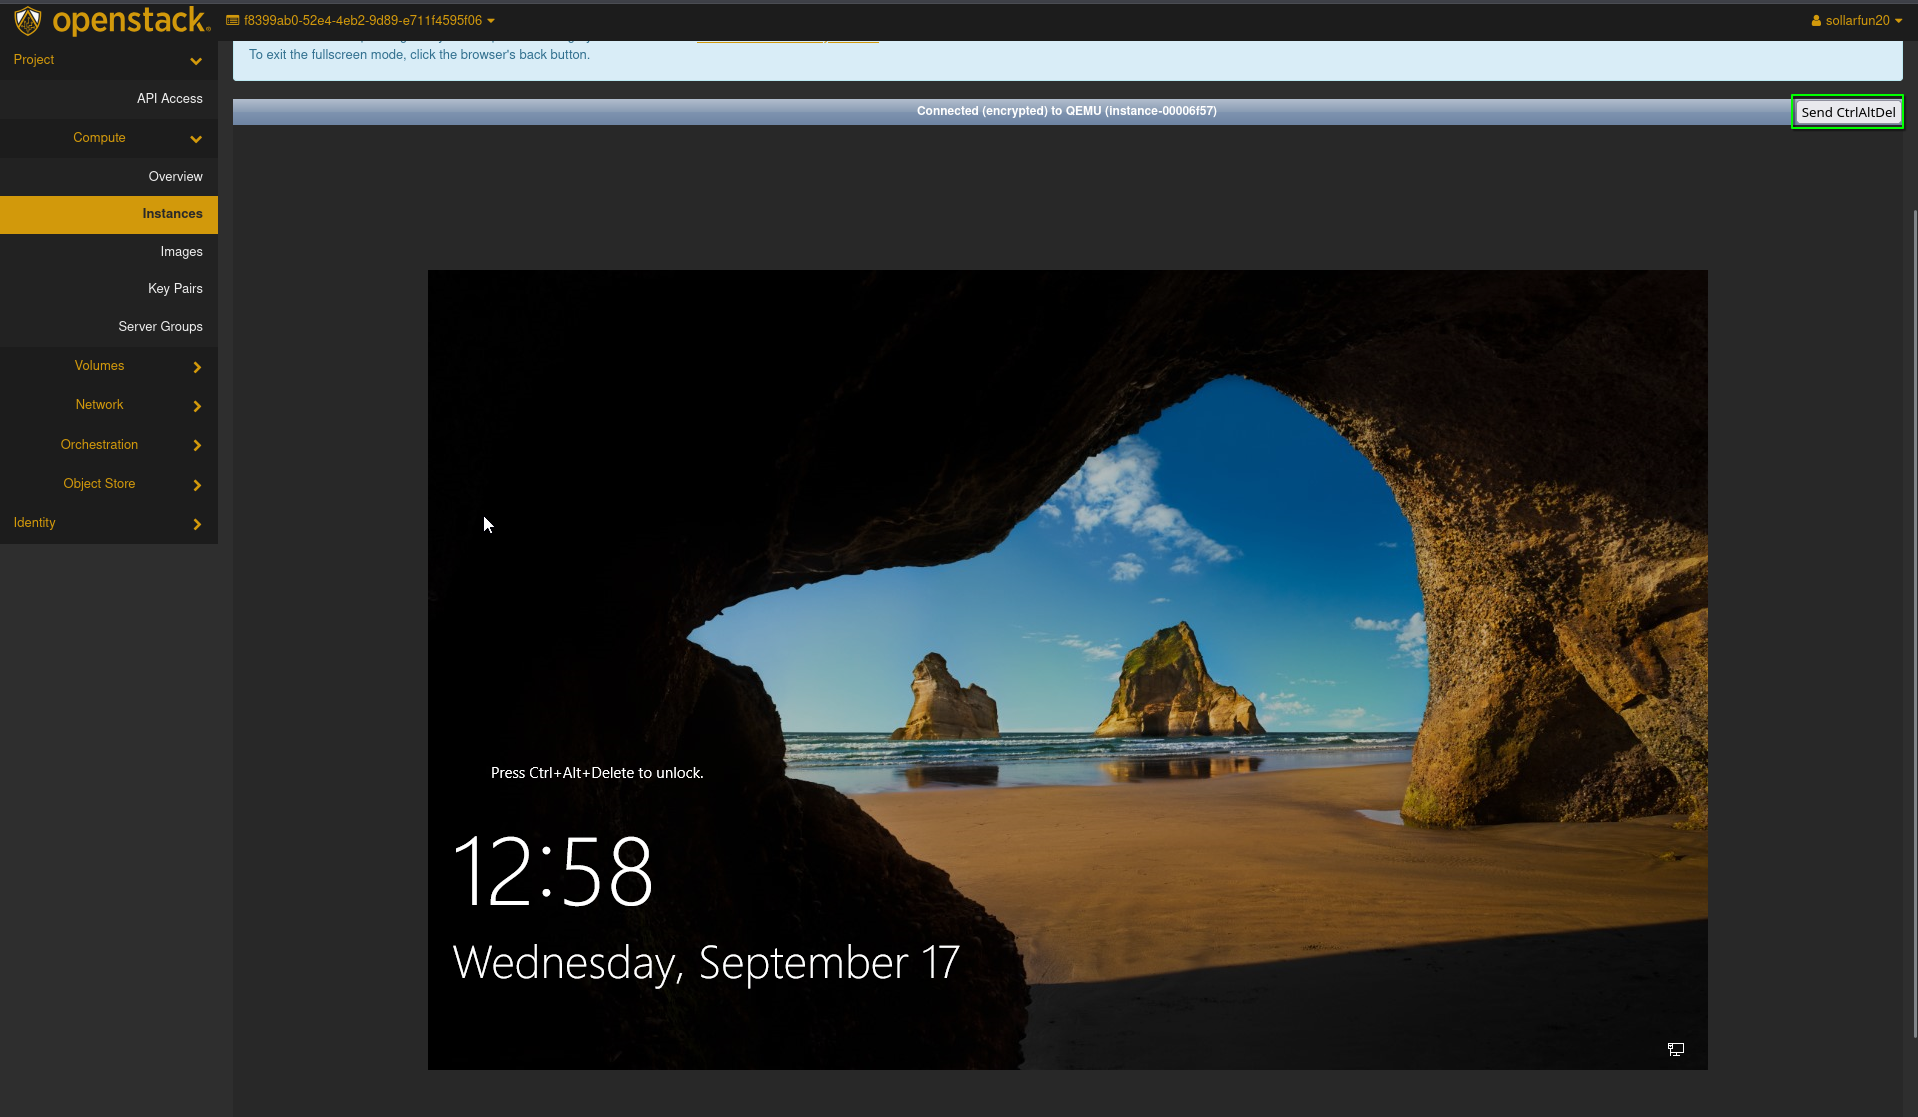
- Log into the instance. If this is your first time, it may ask you to change the password. If it asks you for the pervious password, enter the password you retrieved earlier, then enter in the password you would like, make sure to note it down.
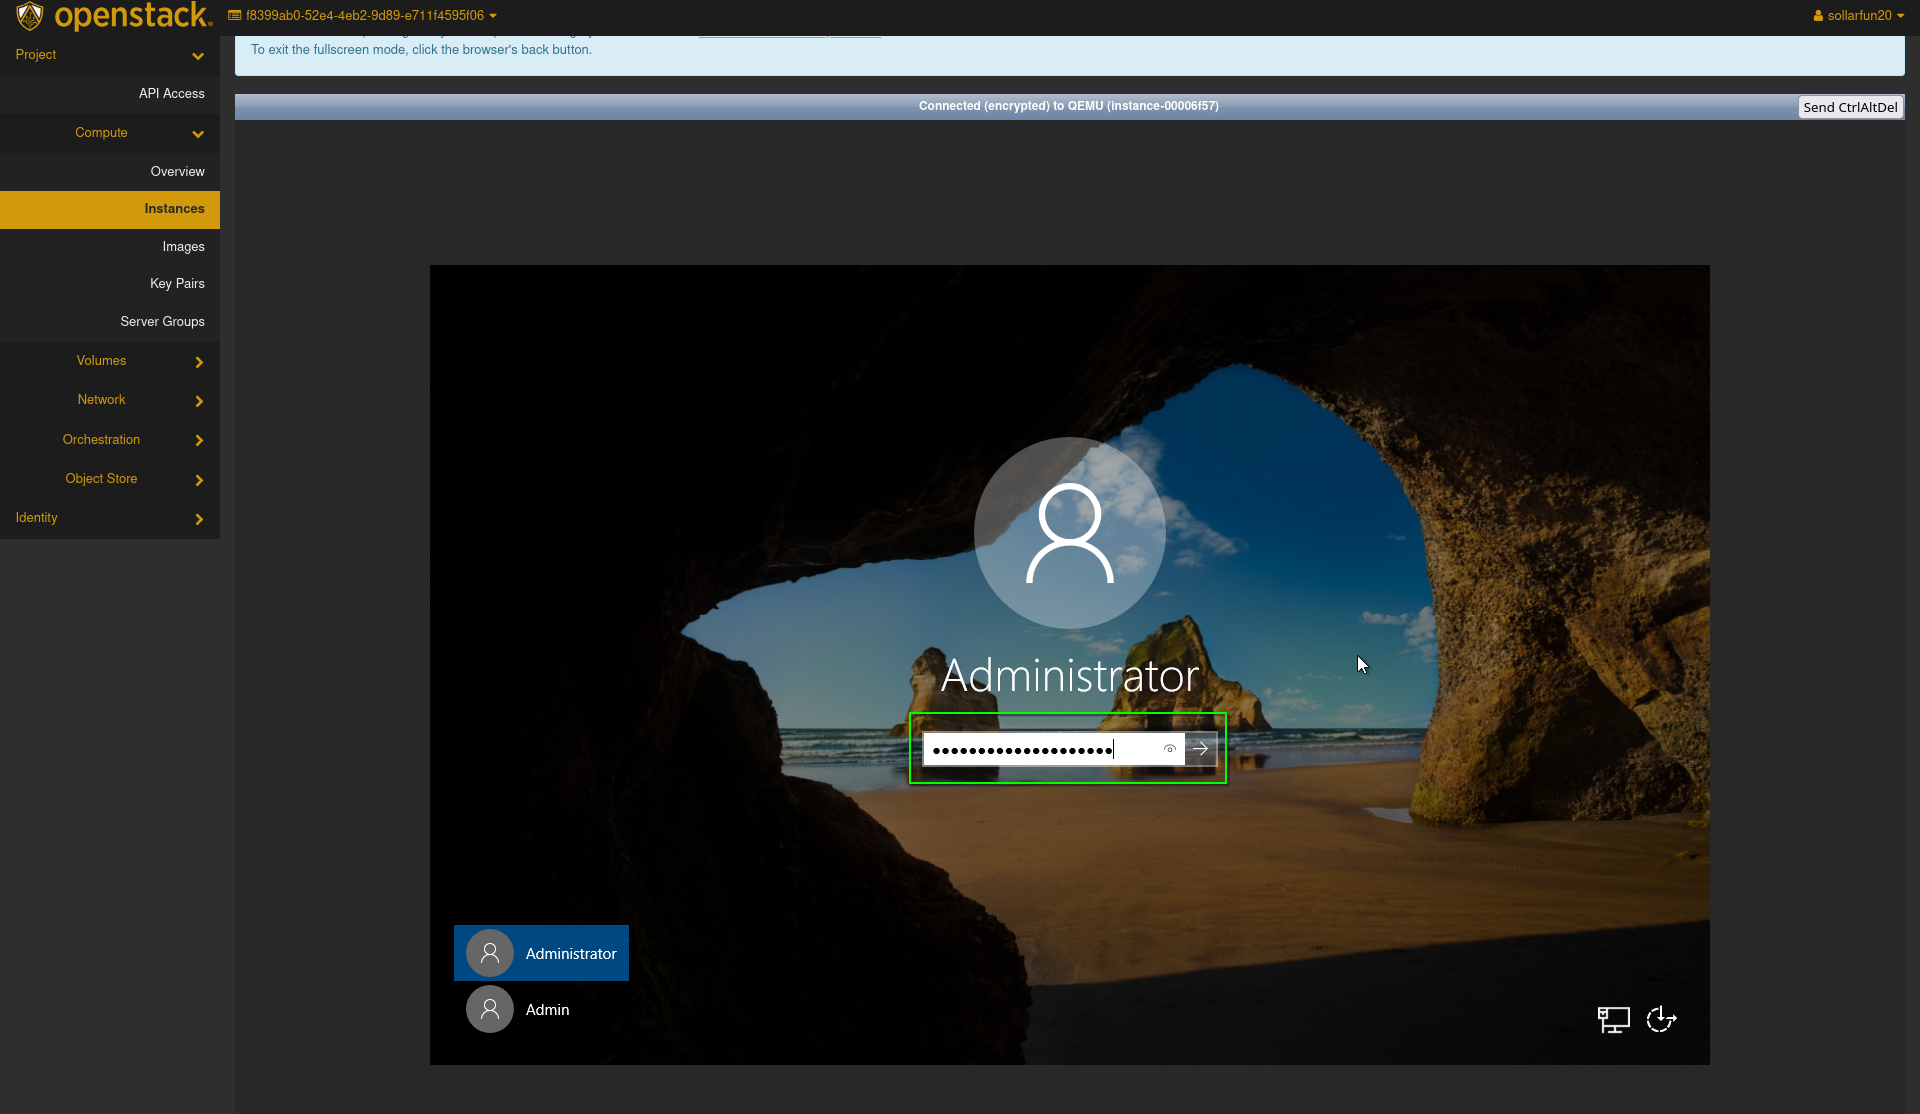
- You may now access the instance through the openstack console normally as you would any other windows device.
Method 2: Using Remote Desktop Connection (RDP)
Remote Desktop Connection (Also known as RDP somtimes) is a program in Microsoft Windows that allows you to access another Windows computer over a network. Using this method has added benefits such as easy folder sharing, viewing the Instance in full-screen mode, clipboard sharing and more!
By default, Openstack blocks all inbound connections to Instances and therefore we need to make a security group to allow inbound RDP access
Important Note: You cannot directly use this method on the very first time you startup your Instance as Windows requires you to set an Administrator password upon Instance creation. Follow Method 1 to gain initial access to the machine and add a password.
Part 1: Opening RDP Access for your Instance
Step 1: Creating a security group
- Connect to Infra via OpenVPN or
Cyberlab Secure - Go to
horizon.hackucf.cloudand log into your account - Click on
Networkon the left-hand pane and thenSecurity Groups
- On the right-hand side, click on
Create Security Groupand give it a name and description, then pressCreate Security Group

- On the Manage Security Group Rules screen, click
Add rule
- Choose the
RDPRule in the Rule dropdown, leave all other options as default and clickAdd
This new group can be applied to any future Windows Instances to quickly allow RDP access
Step 2: Adding the security group to your Instance
-
On the left plane, choose
Computeand thenInstances
-
Click on the Instance to add the security group to

-
Click the dropdown arrow on the right and select
Edit Security Groups
-
Select the appropriate security group and select
Save

RDP will now be allowed through the Openstack firewall for the instance!
Part 3: Connecting to your the instance
For the purposes of this guide, we will use the following applications for RDP. * Windows Clients: Open Start Menu > type in "Remote Desktop Connection" * MacOS Clients: Windows App * Linux Clients: Remmina
Connecting from Another Windows Device
This is the most simple way to access a windows instance with RDP, as Windows comes with the needed software pre-installed. Make sure you are connected to the HACK@UCF infrastructure via OpenVPN before attempting to connect
- On the left plane, choose
Computeand thenInstances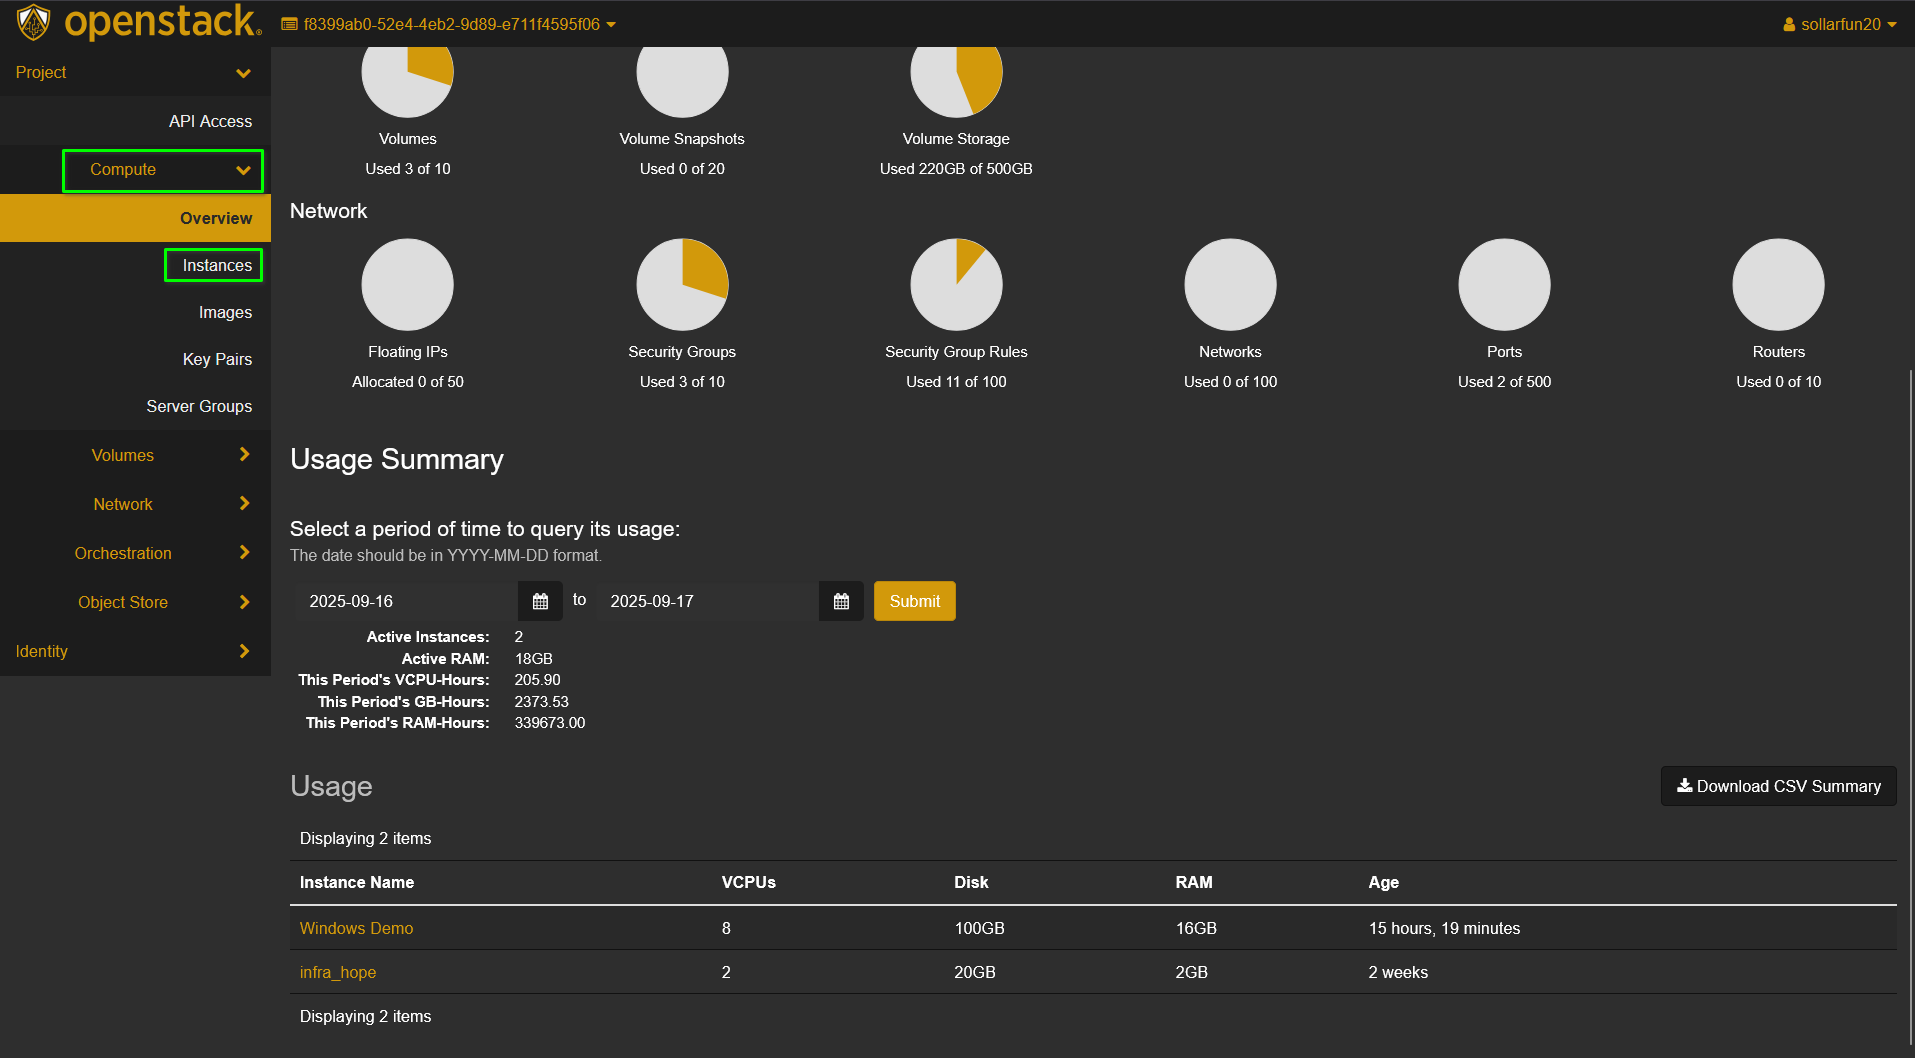
- Locate the name of the instance you want to access and note down it IP address.
- Open the Windows Start Menu, type in "Remote Desktop Connection", and open the
Remote Desktop Connectionapplication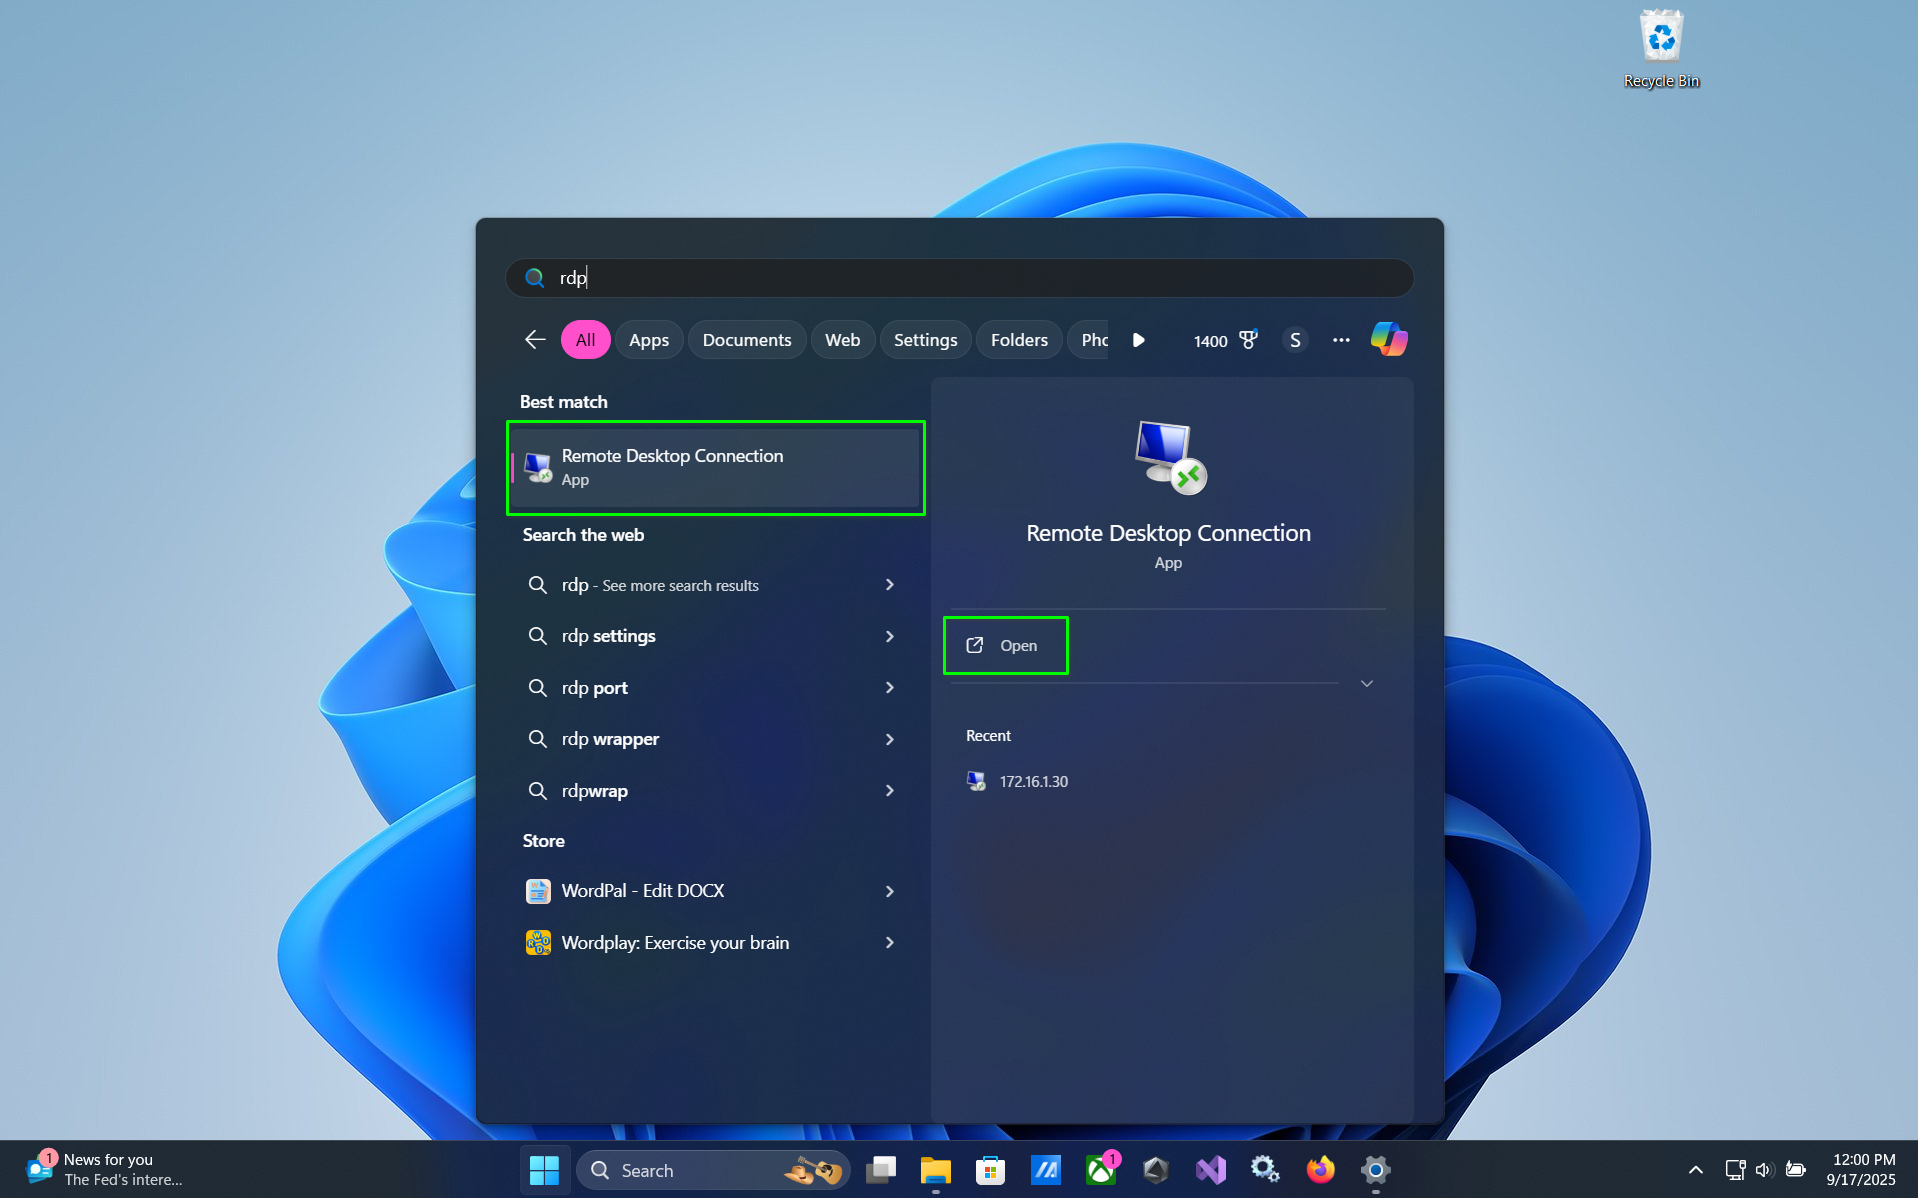
- In the
Computer:field, enter in the IP address of you noted in step 2, and pressConnect.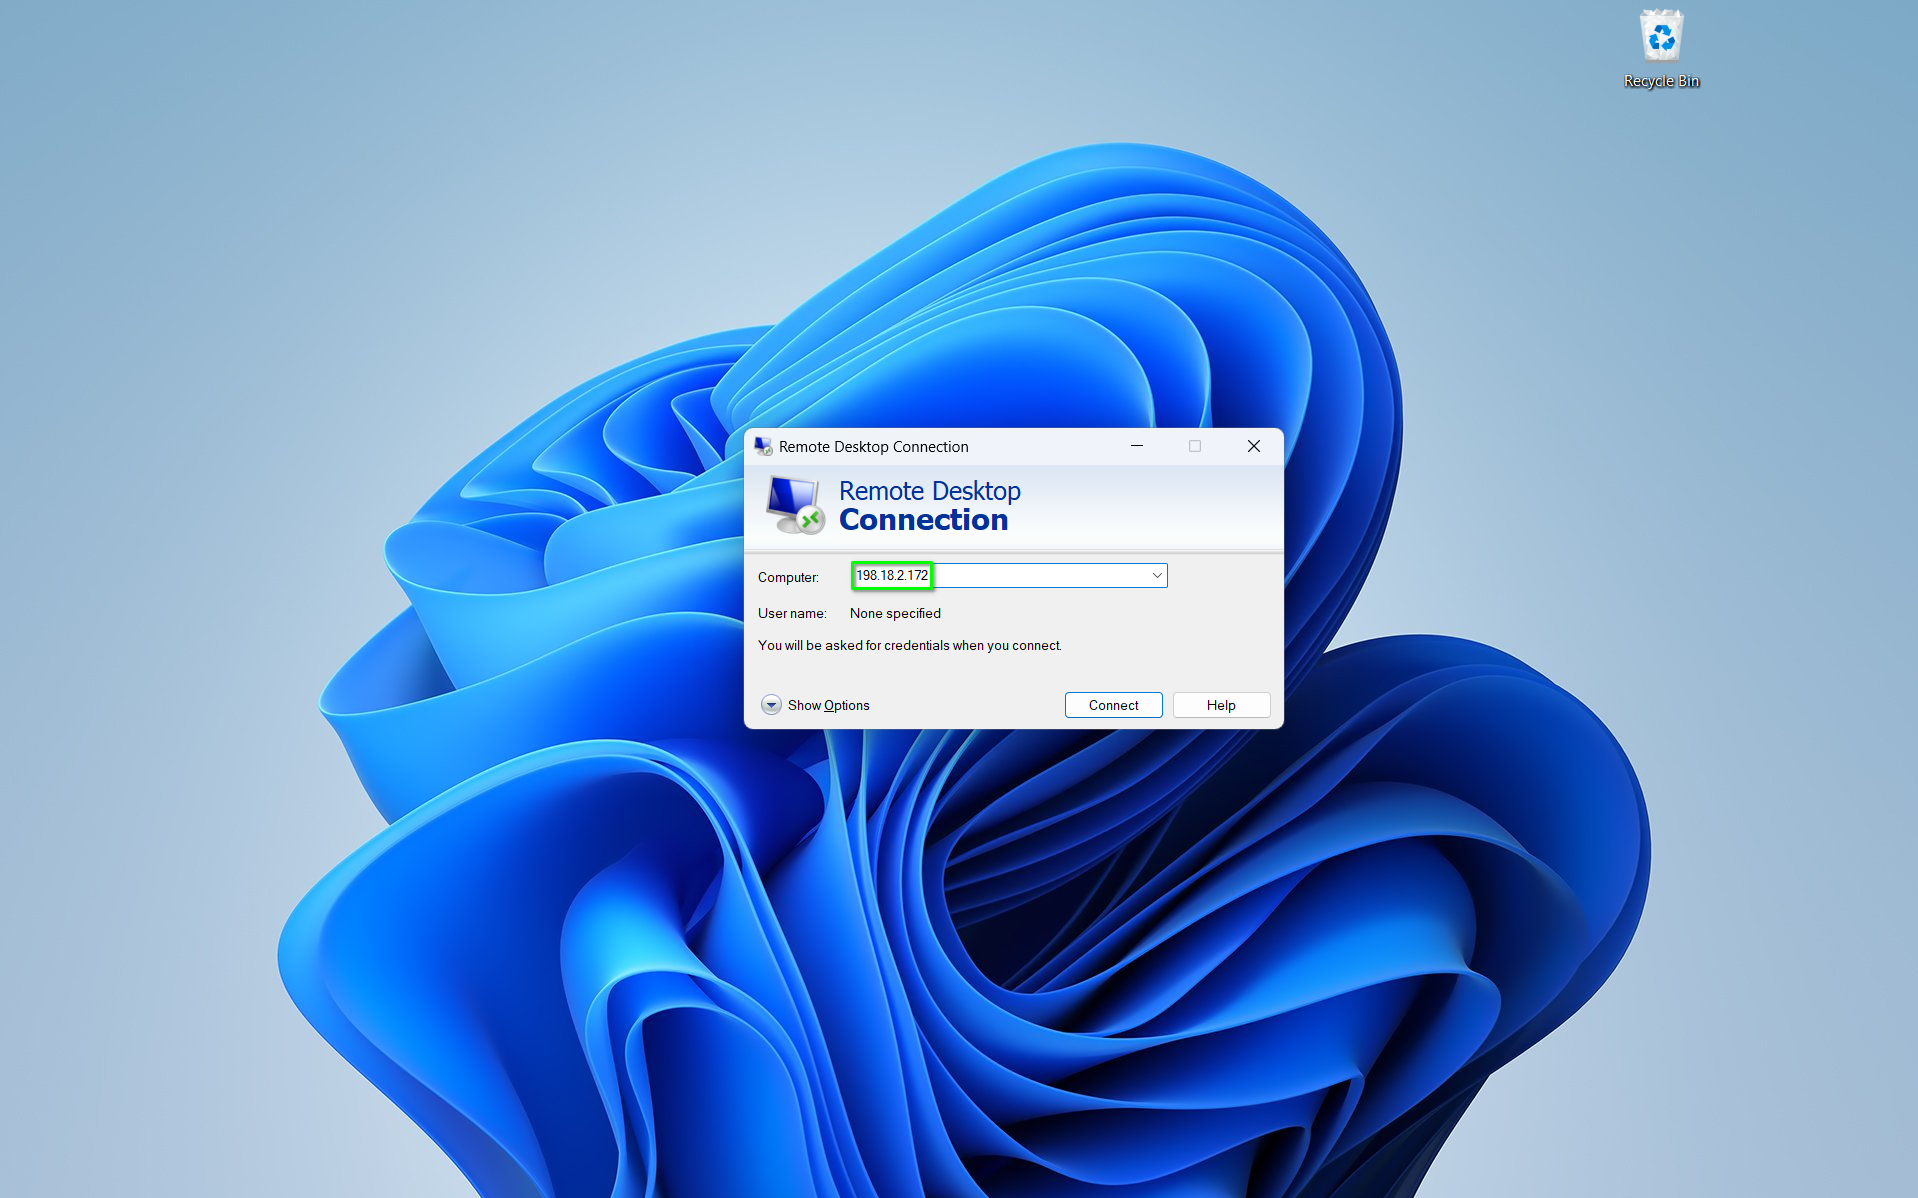
- When windows security prompts you to enter your credentials, select
Use a different account.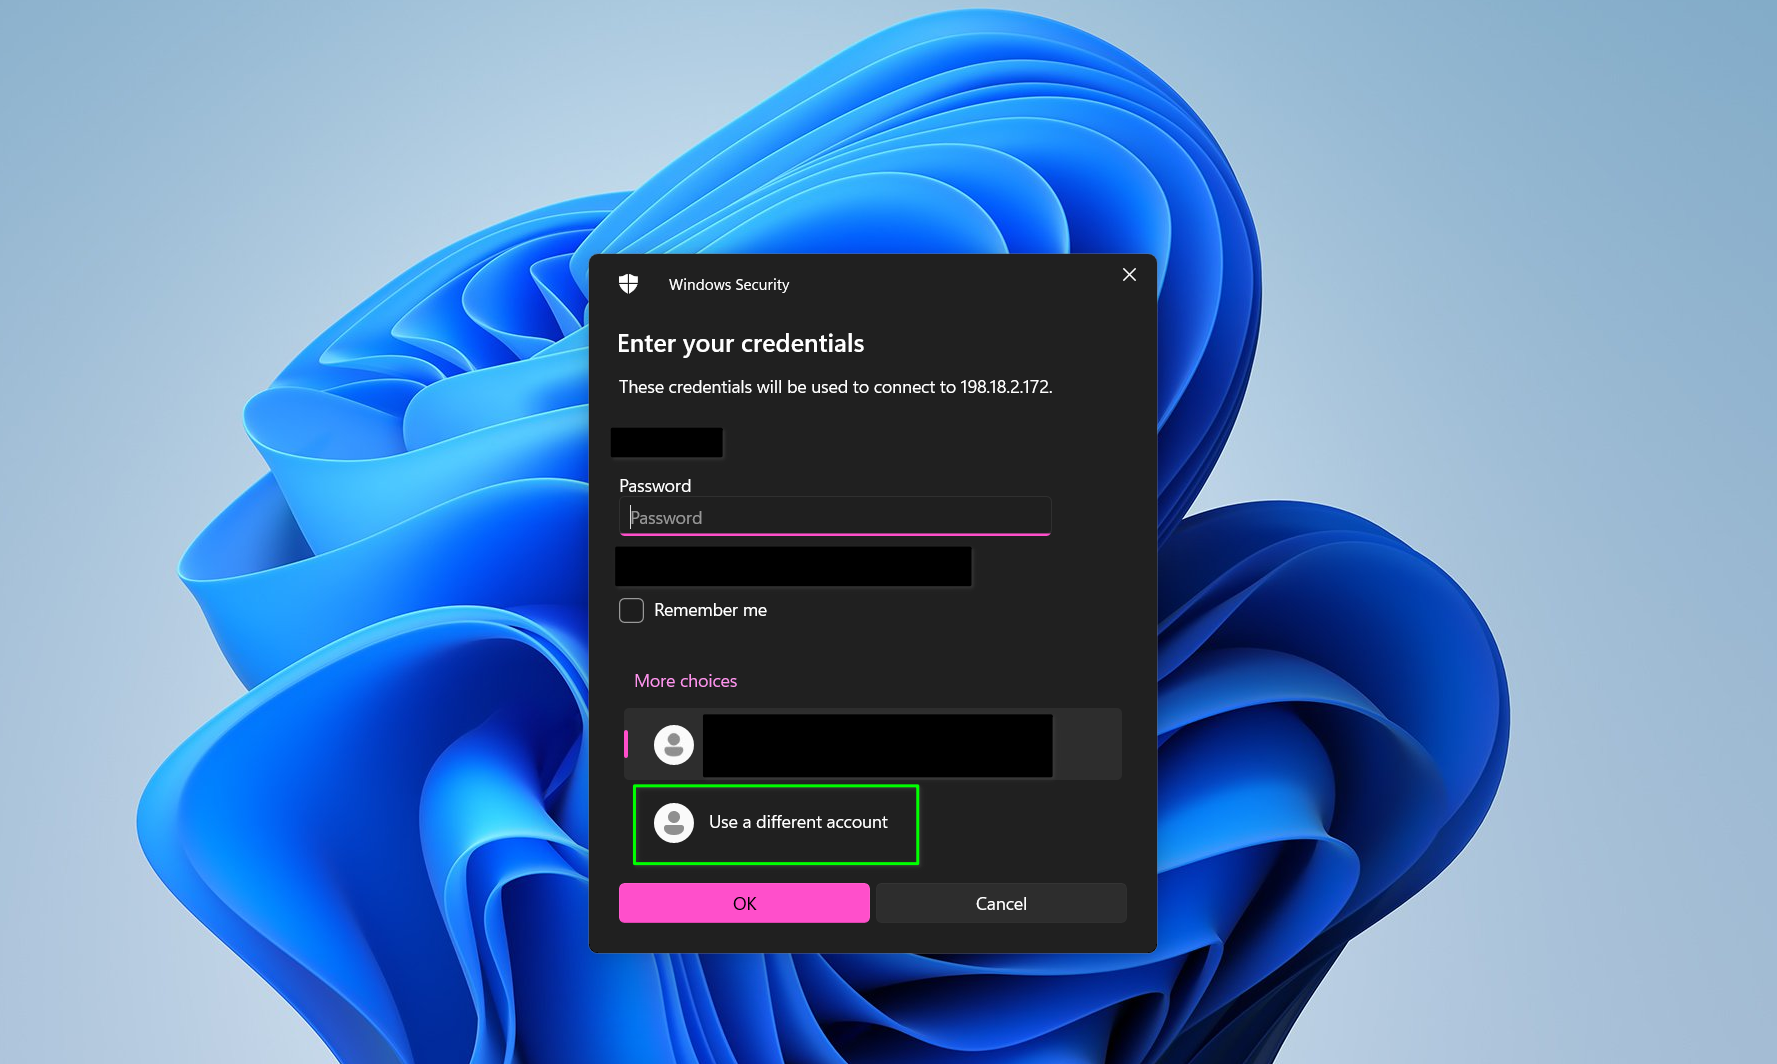
- In the
User namefield, enter "Administrator", and in thePasswordfield, enter in the password you set when first logging in to your Windows instance, then selectOK.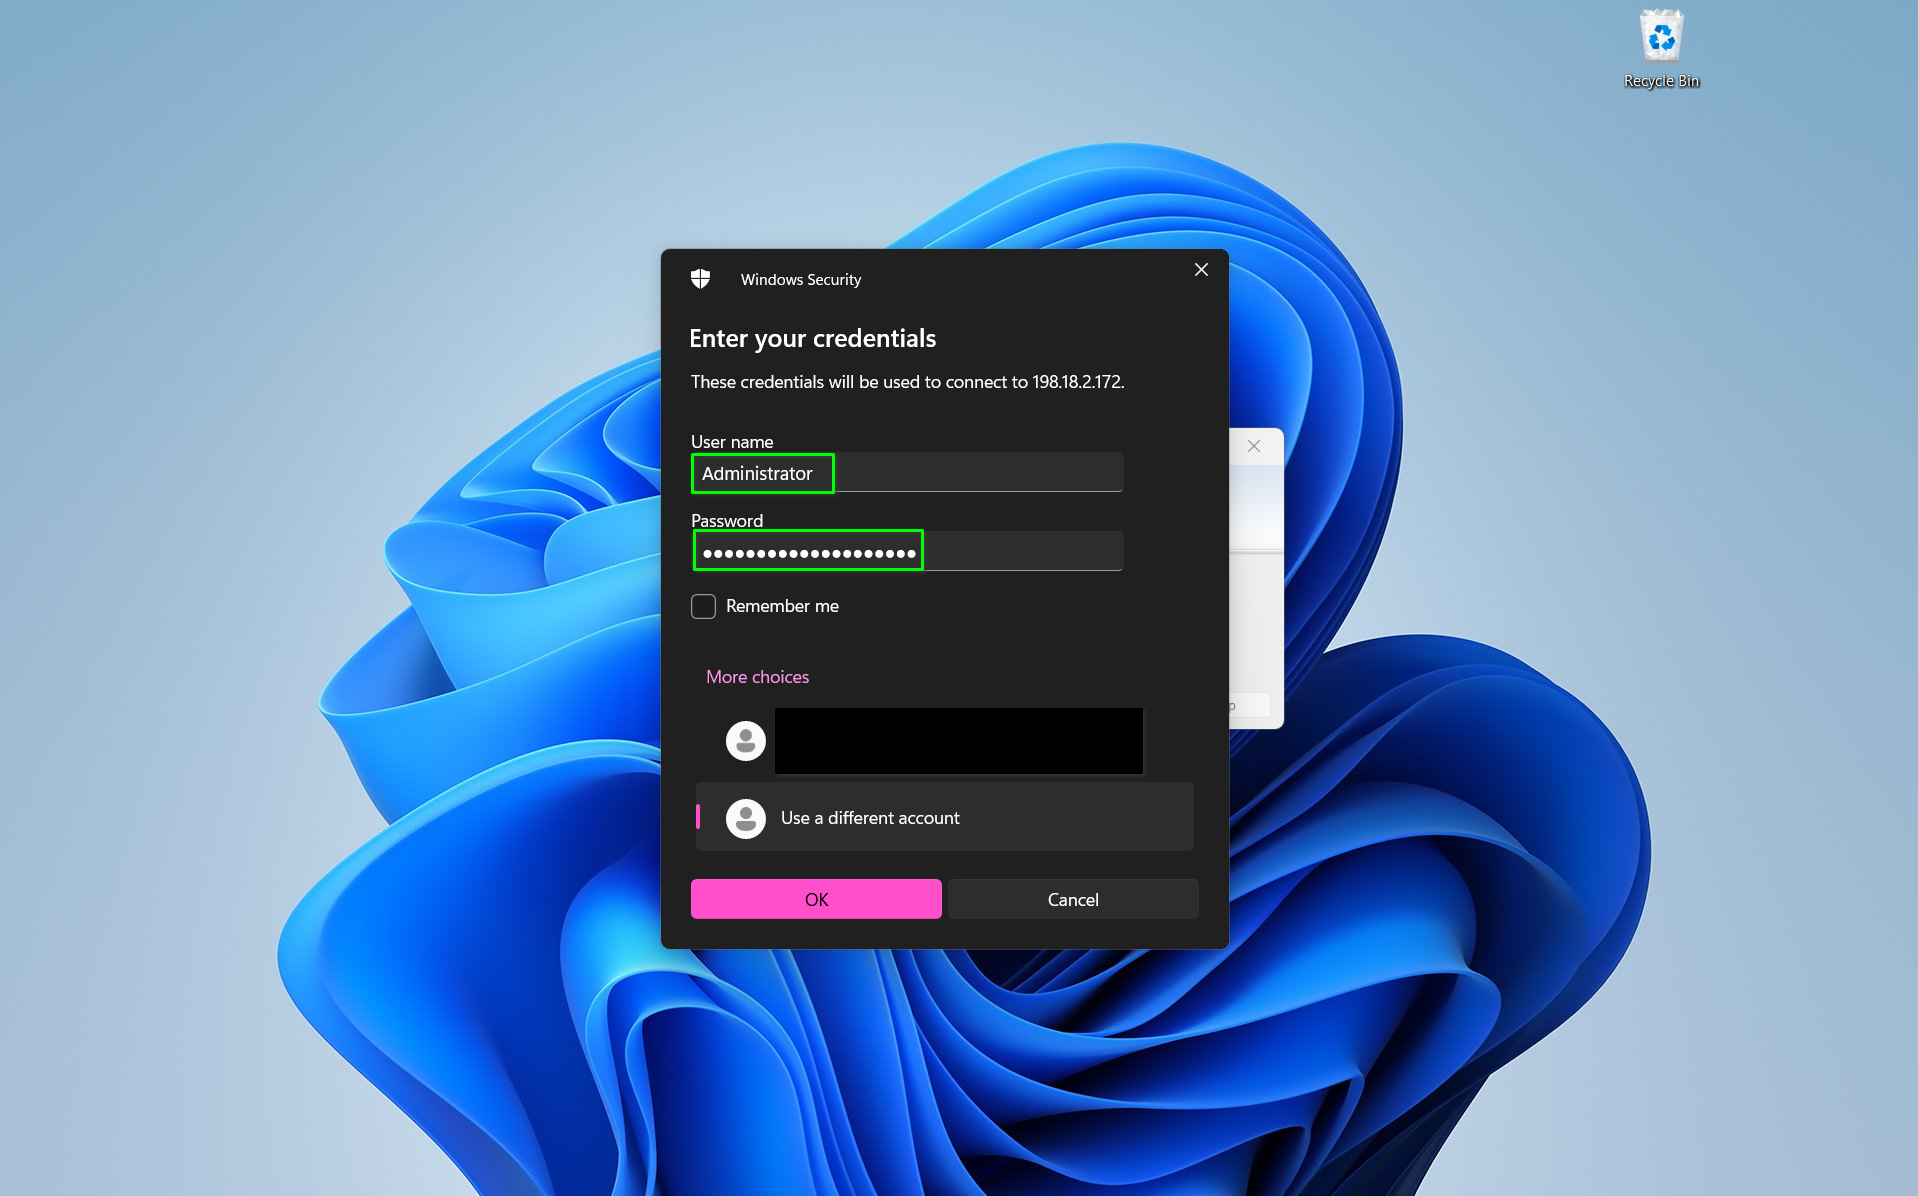
- If you recieve a warning from windows stating that "The identity of the remote computer cannot be verified", check the
Don't ask me again for connections to this computeroption, and then selectYes.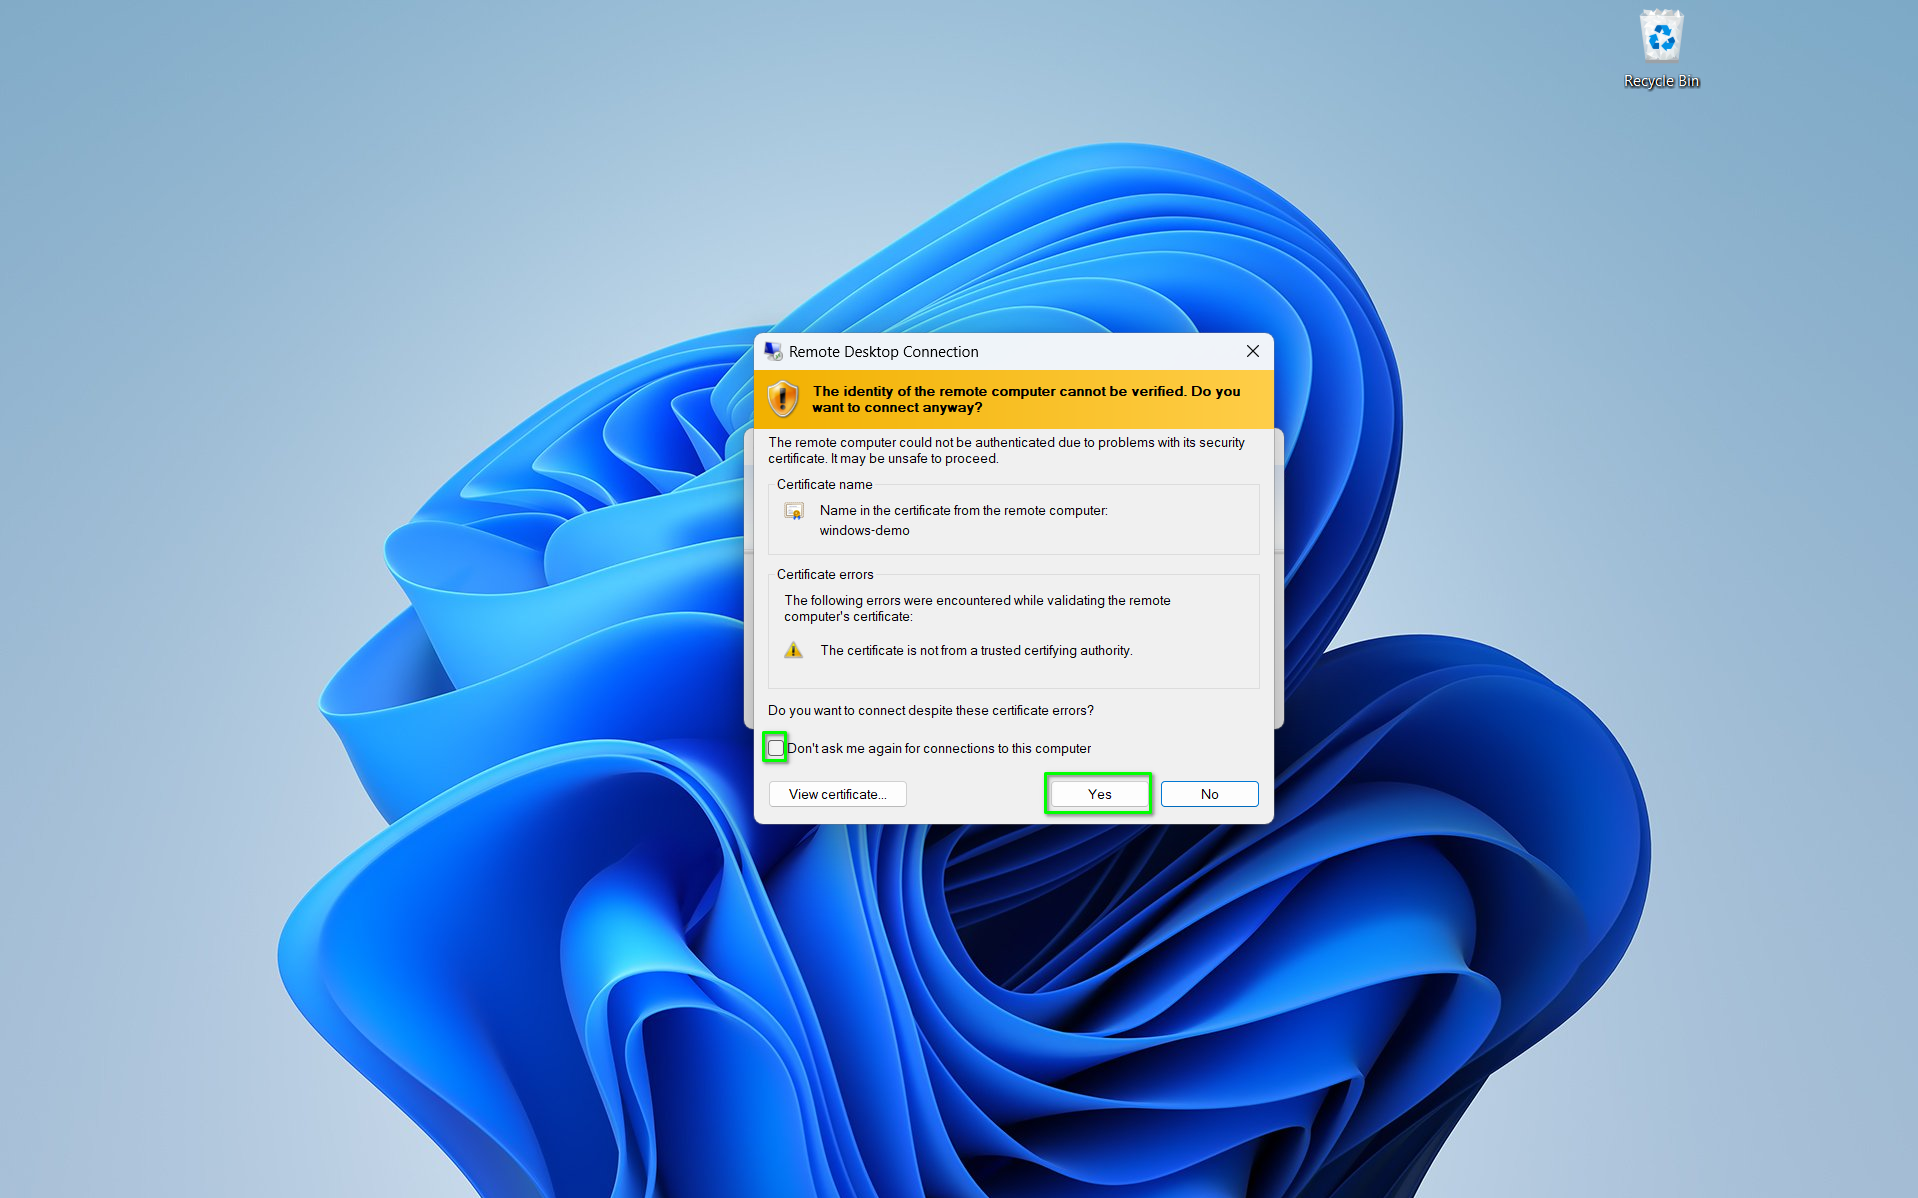
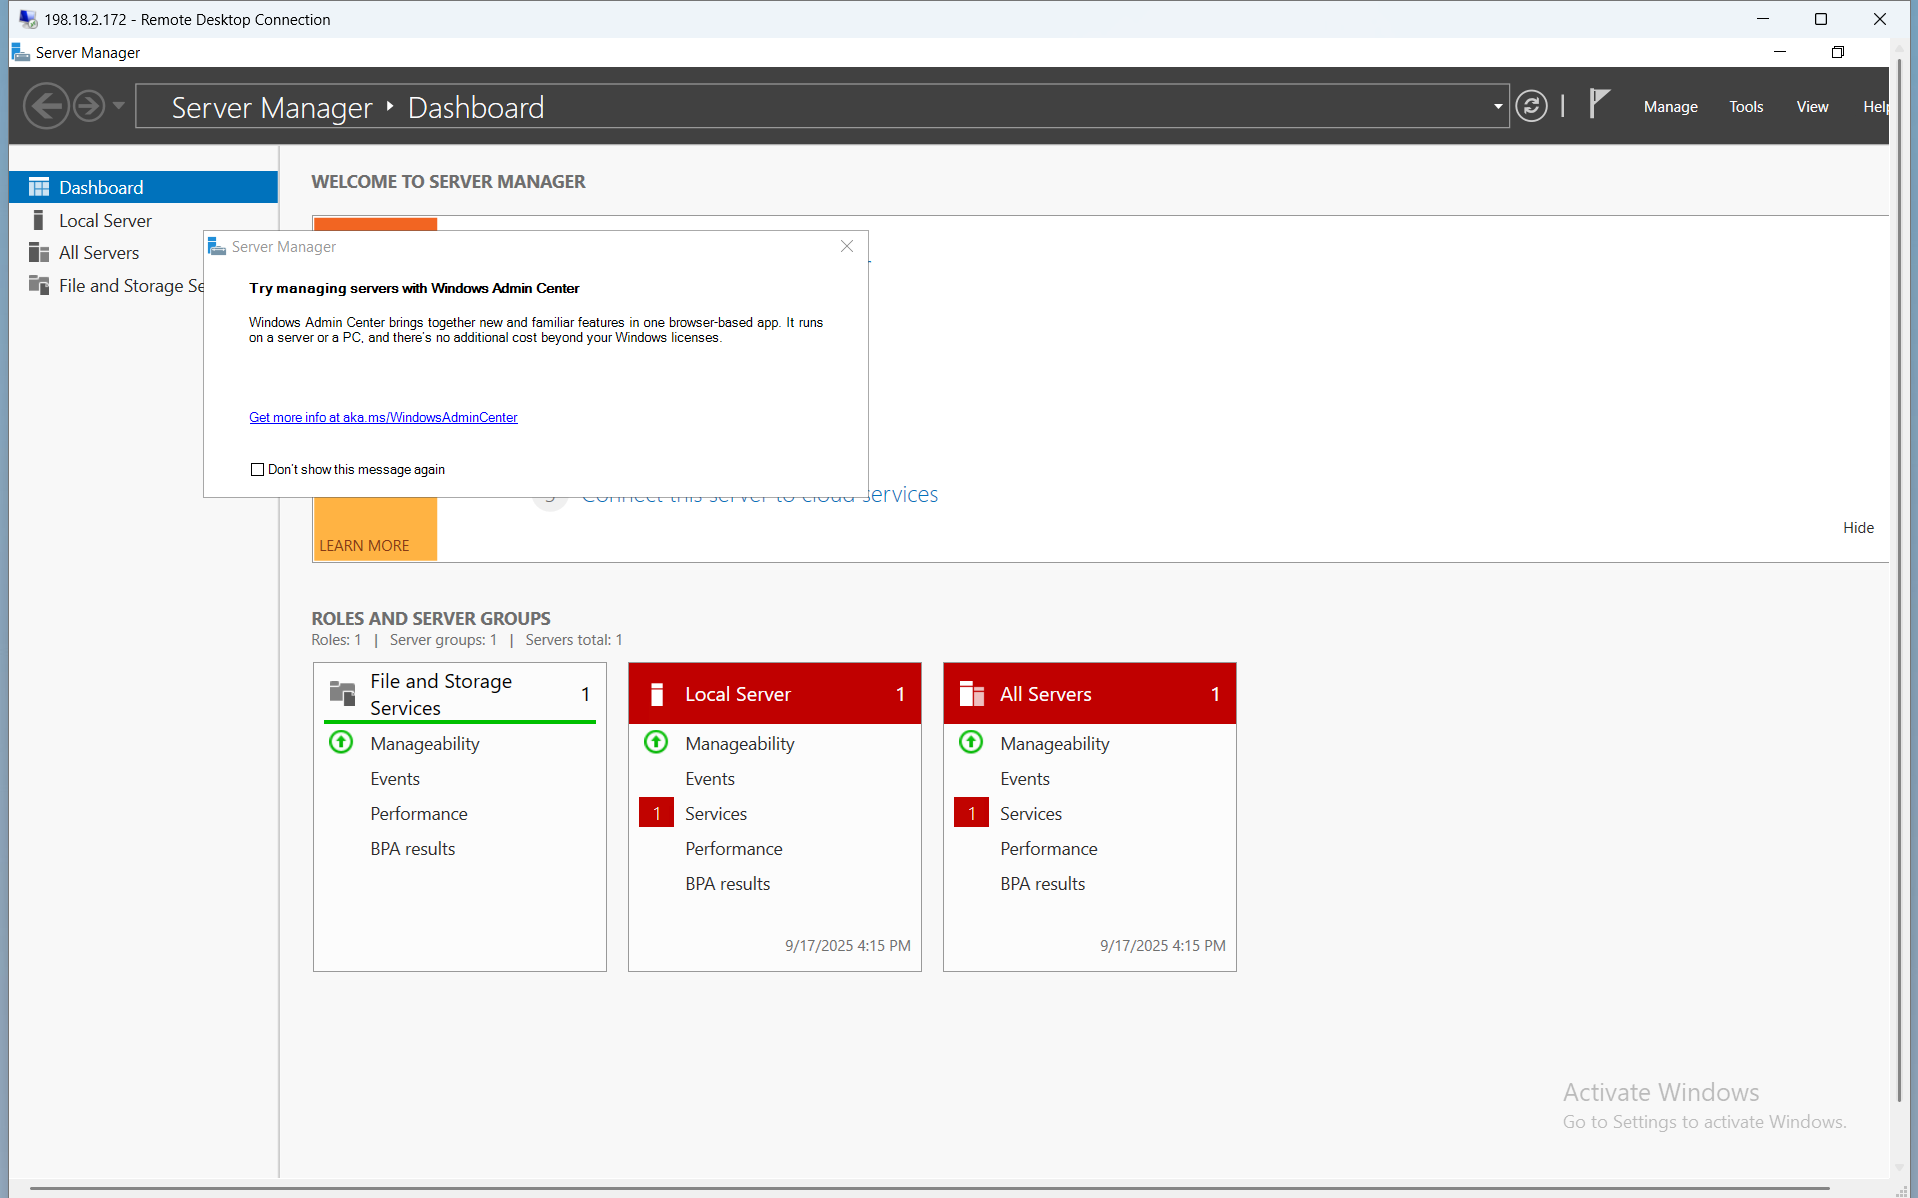
- You are now logged into your instsance, and you can navigate as you would any windows device.
Connecting to your Windows instance from a Linux Device
For connecting to a windows instance with RDP for Linux, we will use the Remmina client. See https://remmina.org/how-to-install-remmina/ for more help with installing the Remmina client.
- Open Remmina, either from your applications menu or the console.
- Press the
+add new connection button in the top left corner.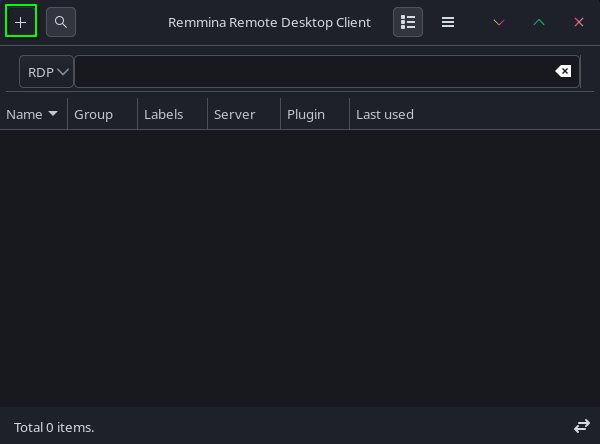
- In the
Namefield, enter in what you would like to name the connection to your windows instance.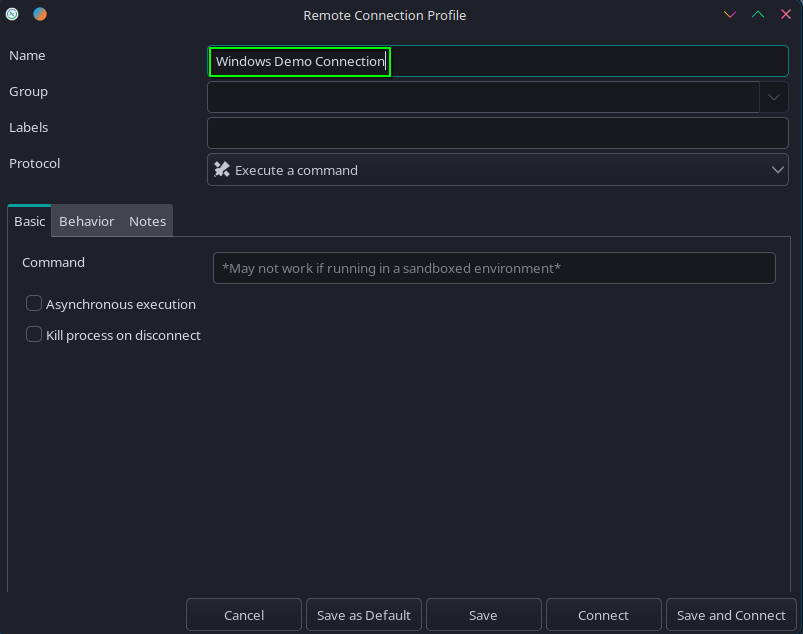
- Select the
Protocoldropdown and selectRDP - Remote Desktop Protocolas your protocol.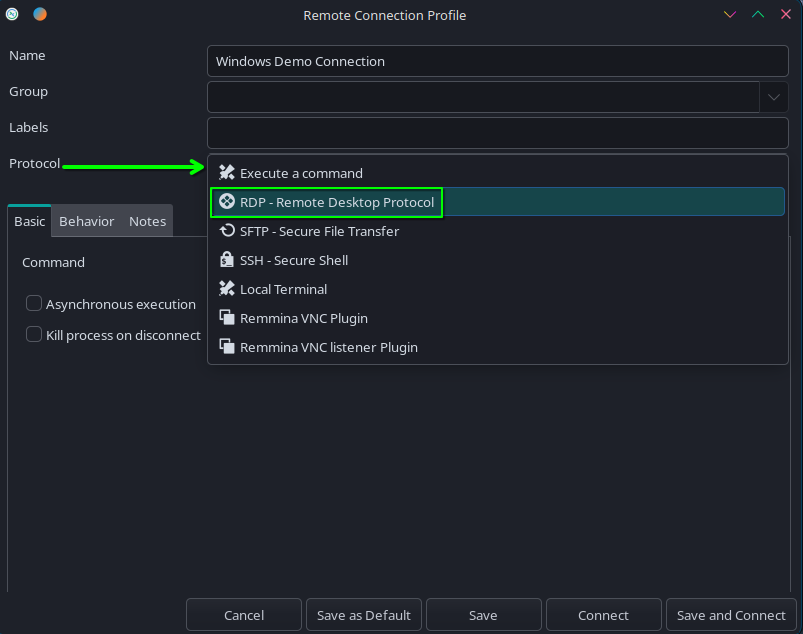
- In the
Serverfield, enter in your instance's IP address.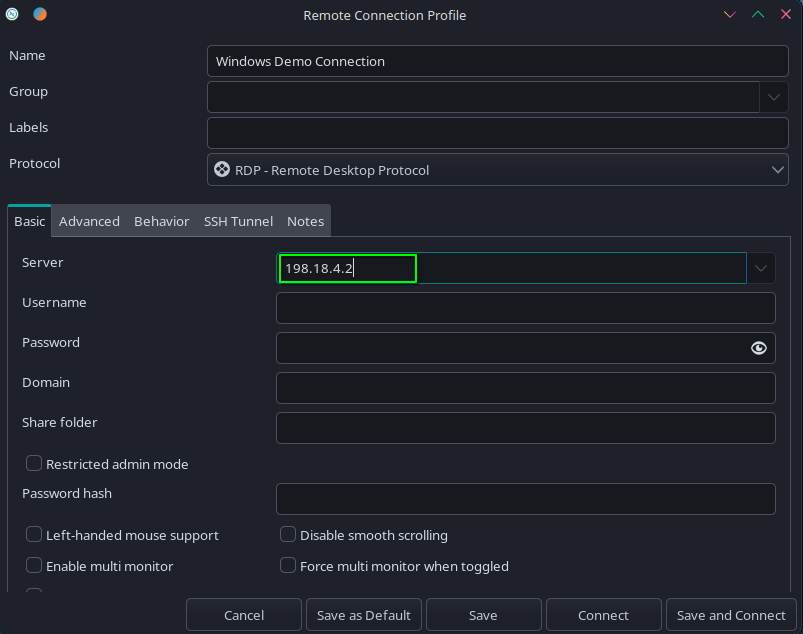
- In the
UsernameandPasswordfields, enter in the username (likely "Administrator") and password you set for the instance earlier.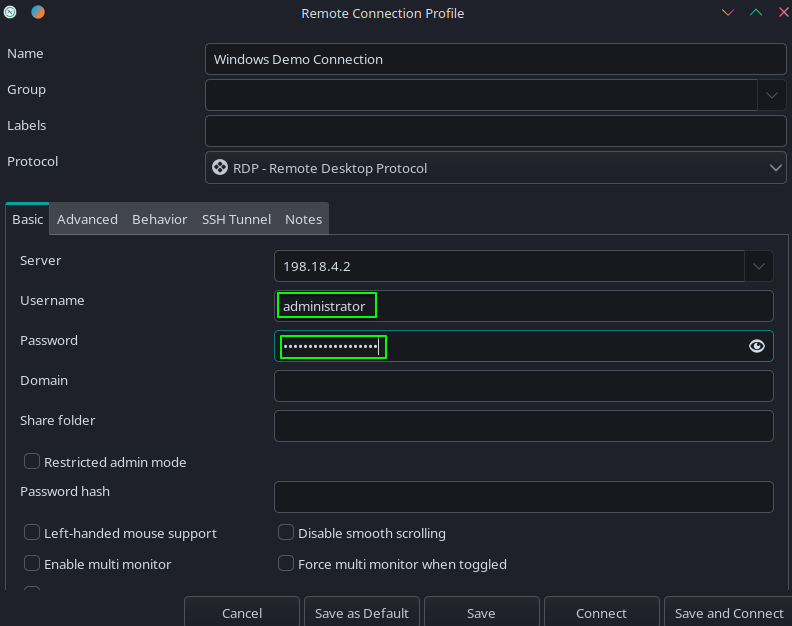
- Select
Save and Connect.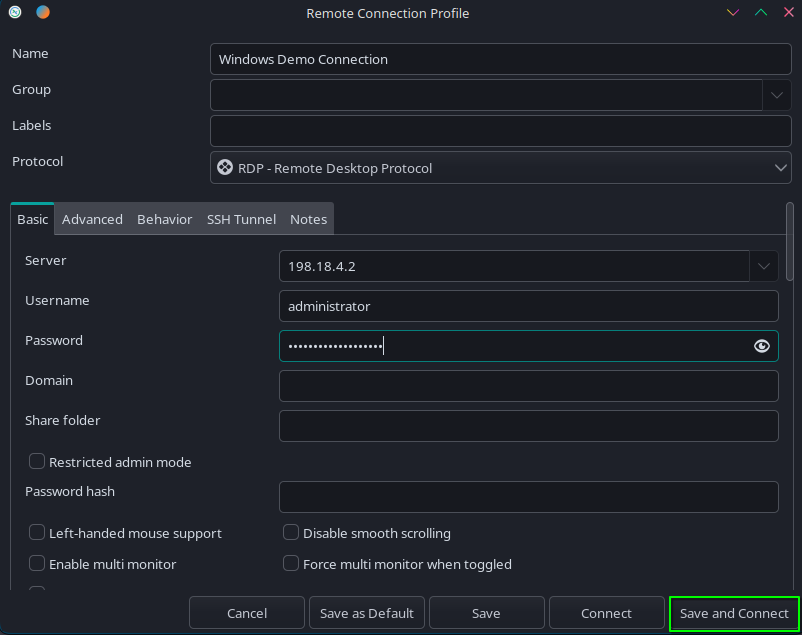
- When prompted to accept the server's certificate, select
Yes.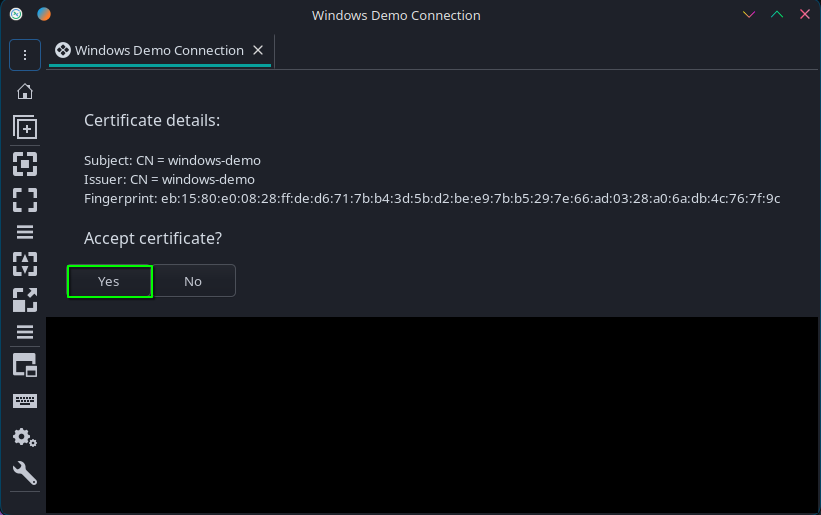
- Verify the authentication credentials, then select
OK.
- You should now be logged in to the windows instance and be able to navigate as you would any windows device.
Connecting to your Windows instance from a mac device
For connecting to a Windows intance with RDP from MacOS, we will use the windows app. See here for more information.
- Open the Windows App.
- Press the
+botton in the top right color and then selectAdd PC.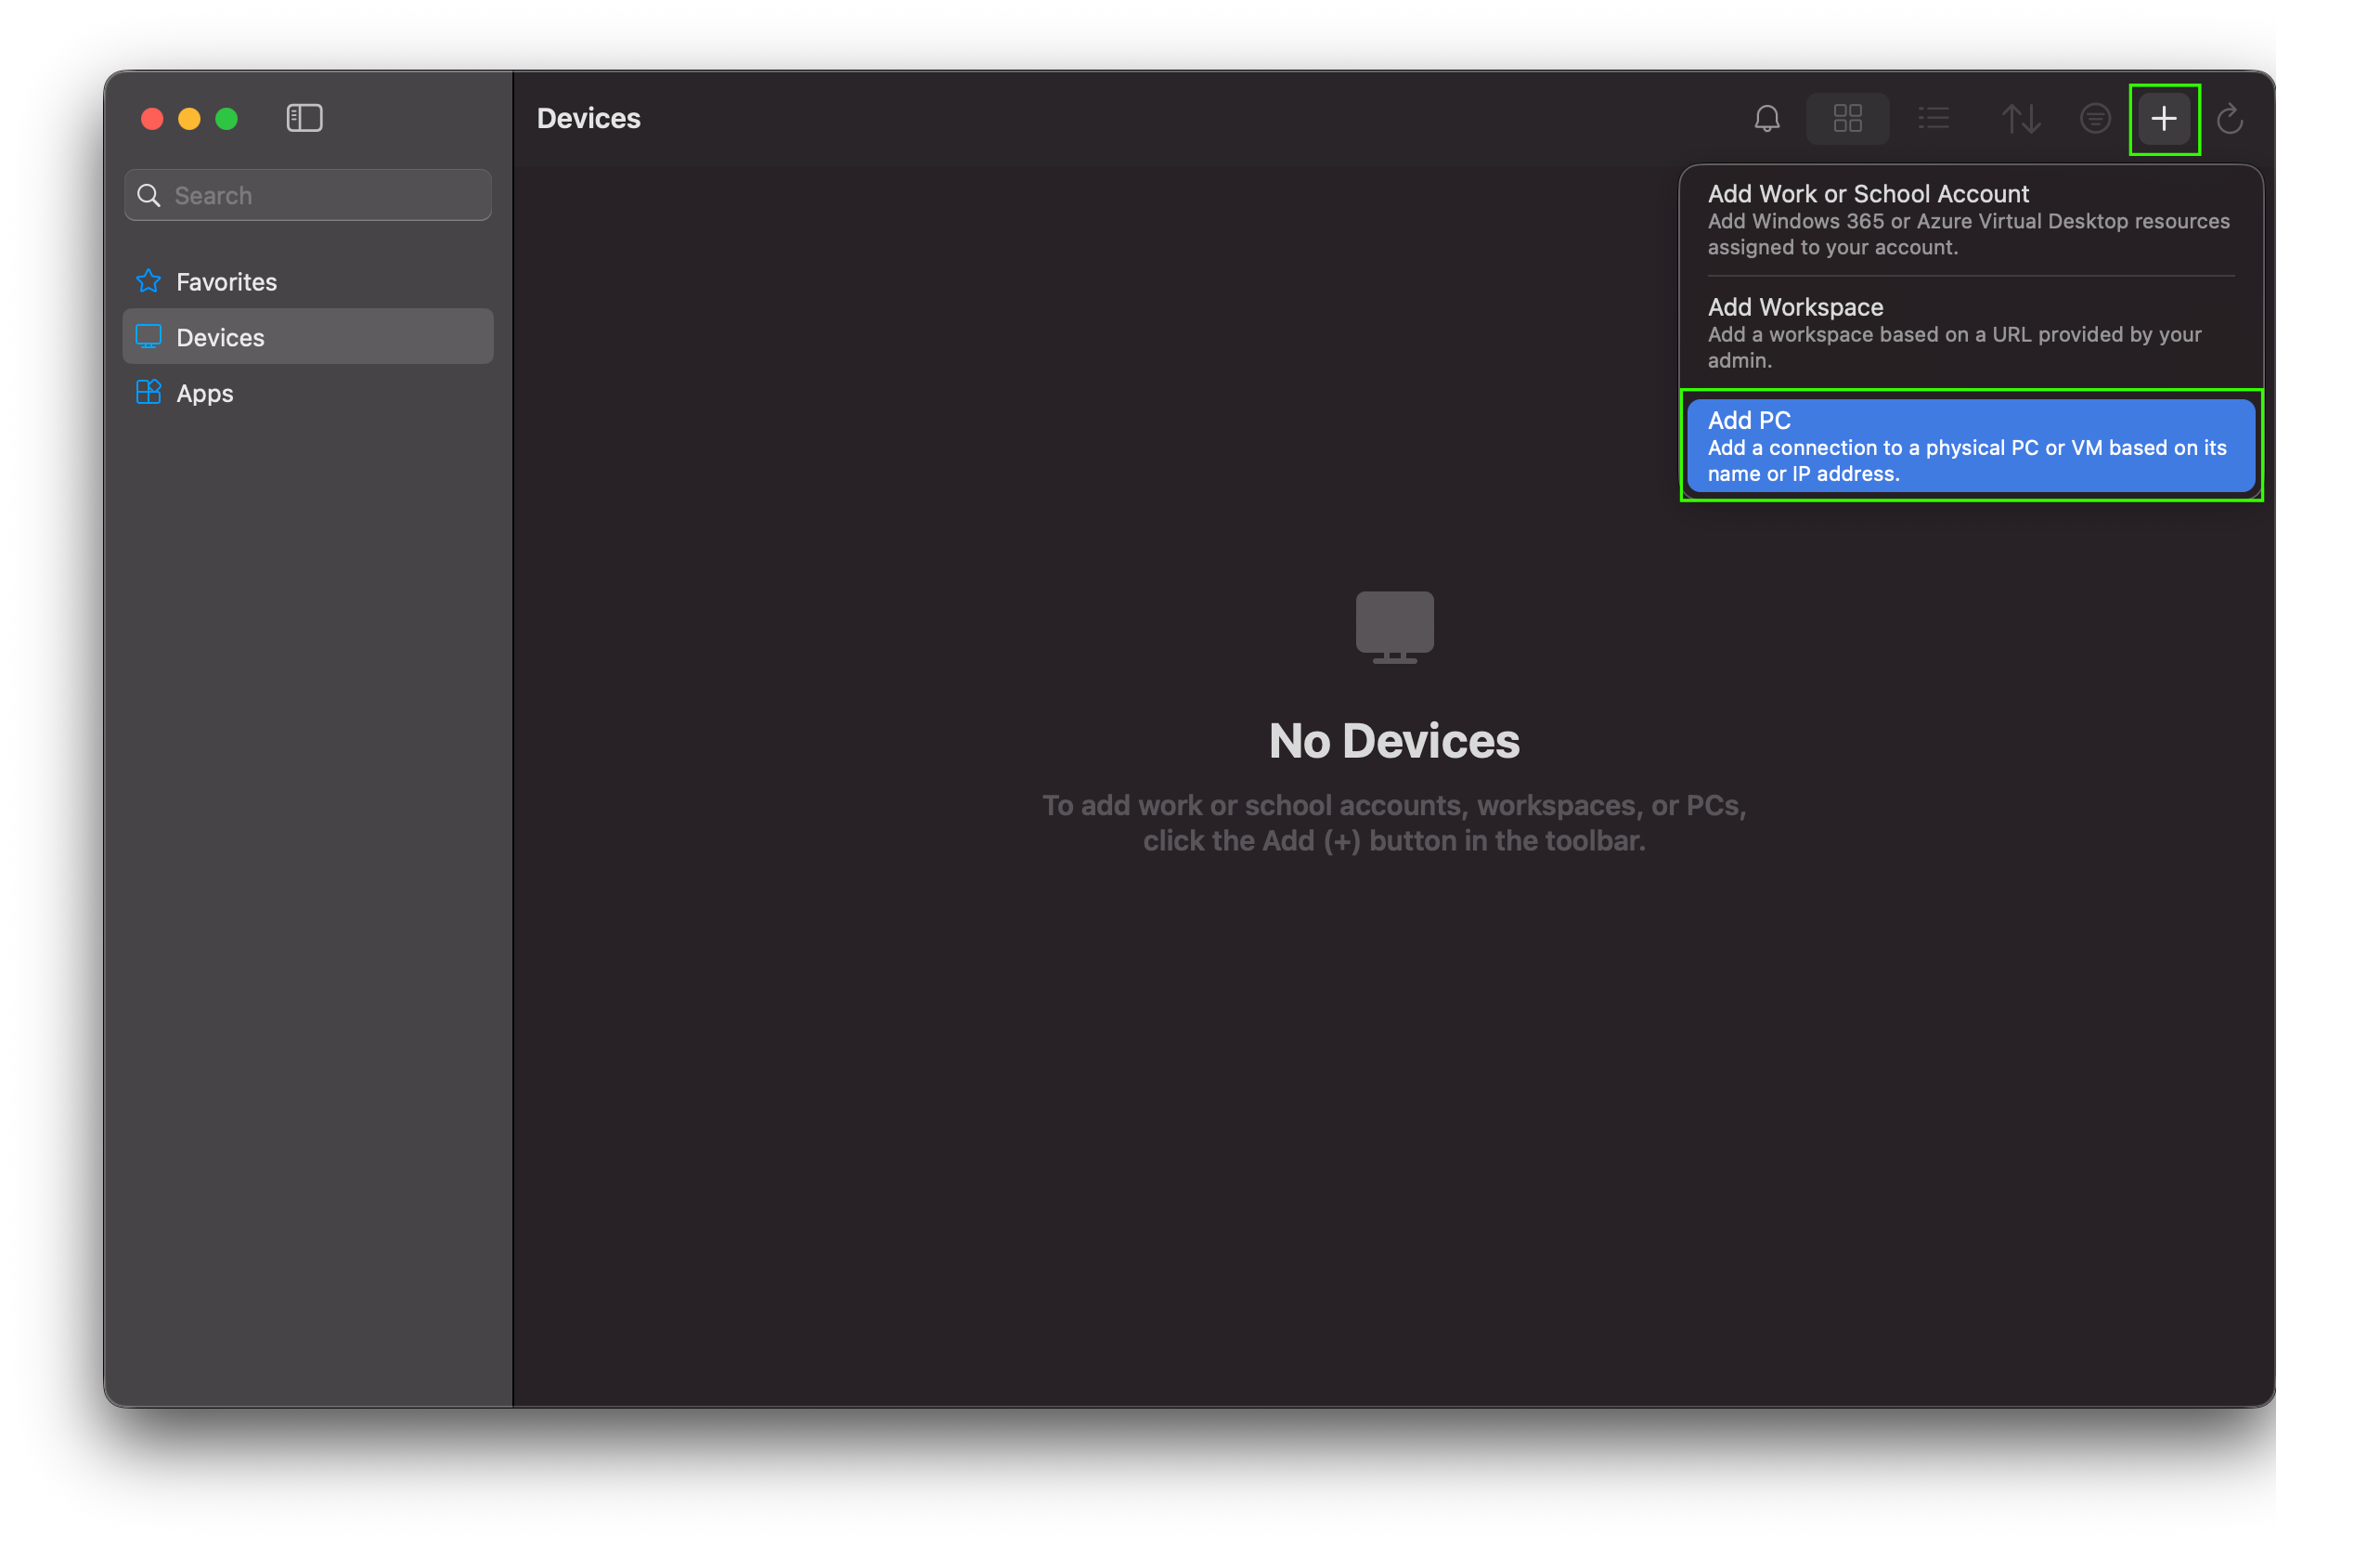
- In the
PC namefield enter the IP address of your instance and in theFriendly nameenter what you would like to name the connection to the instance.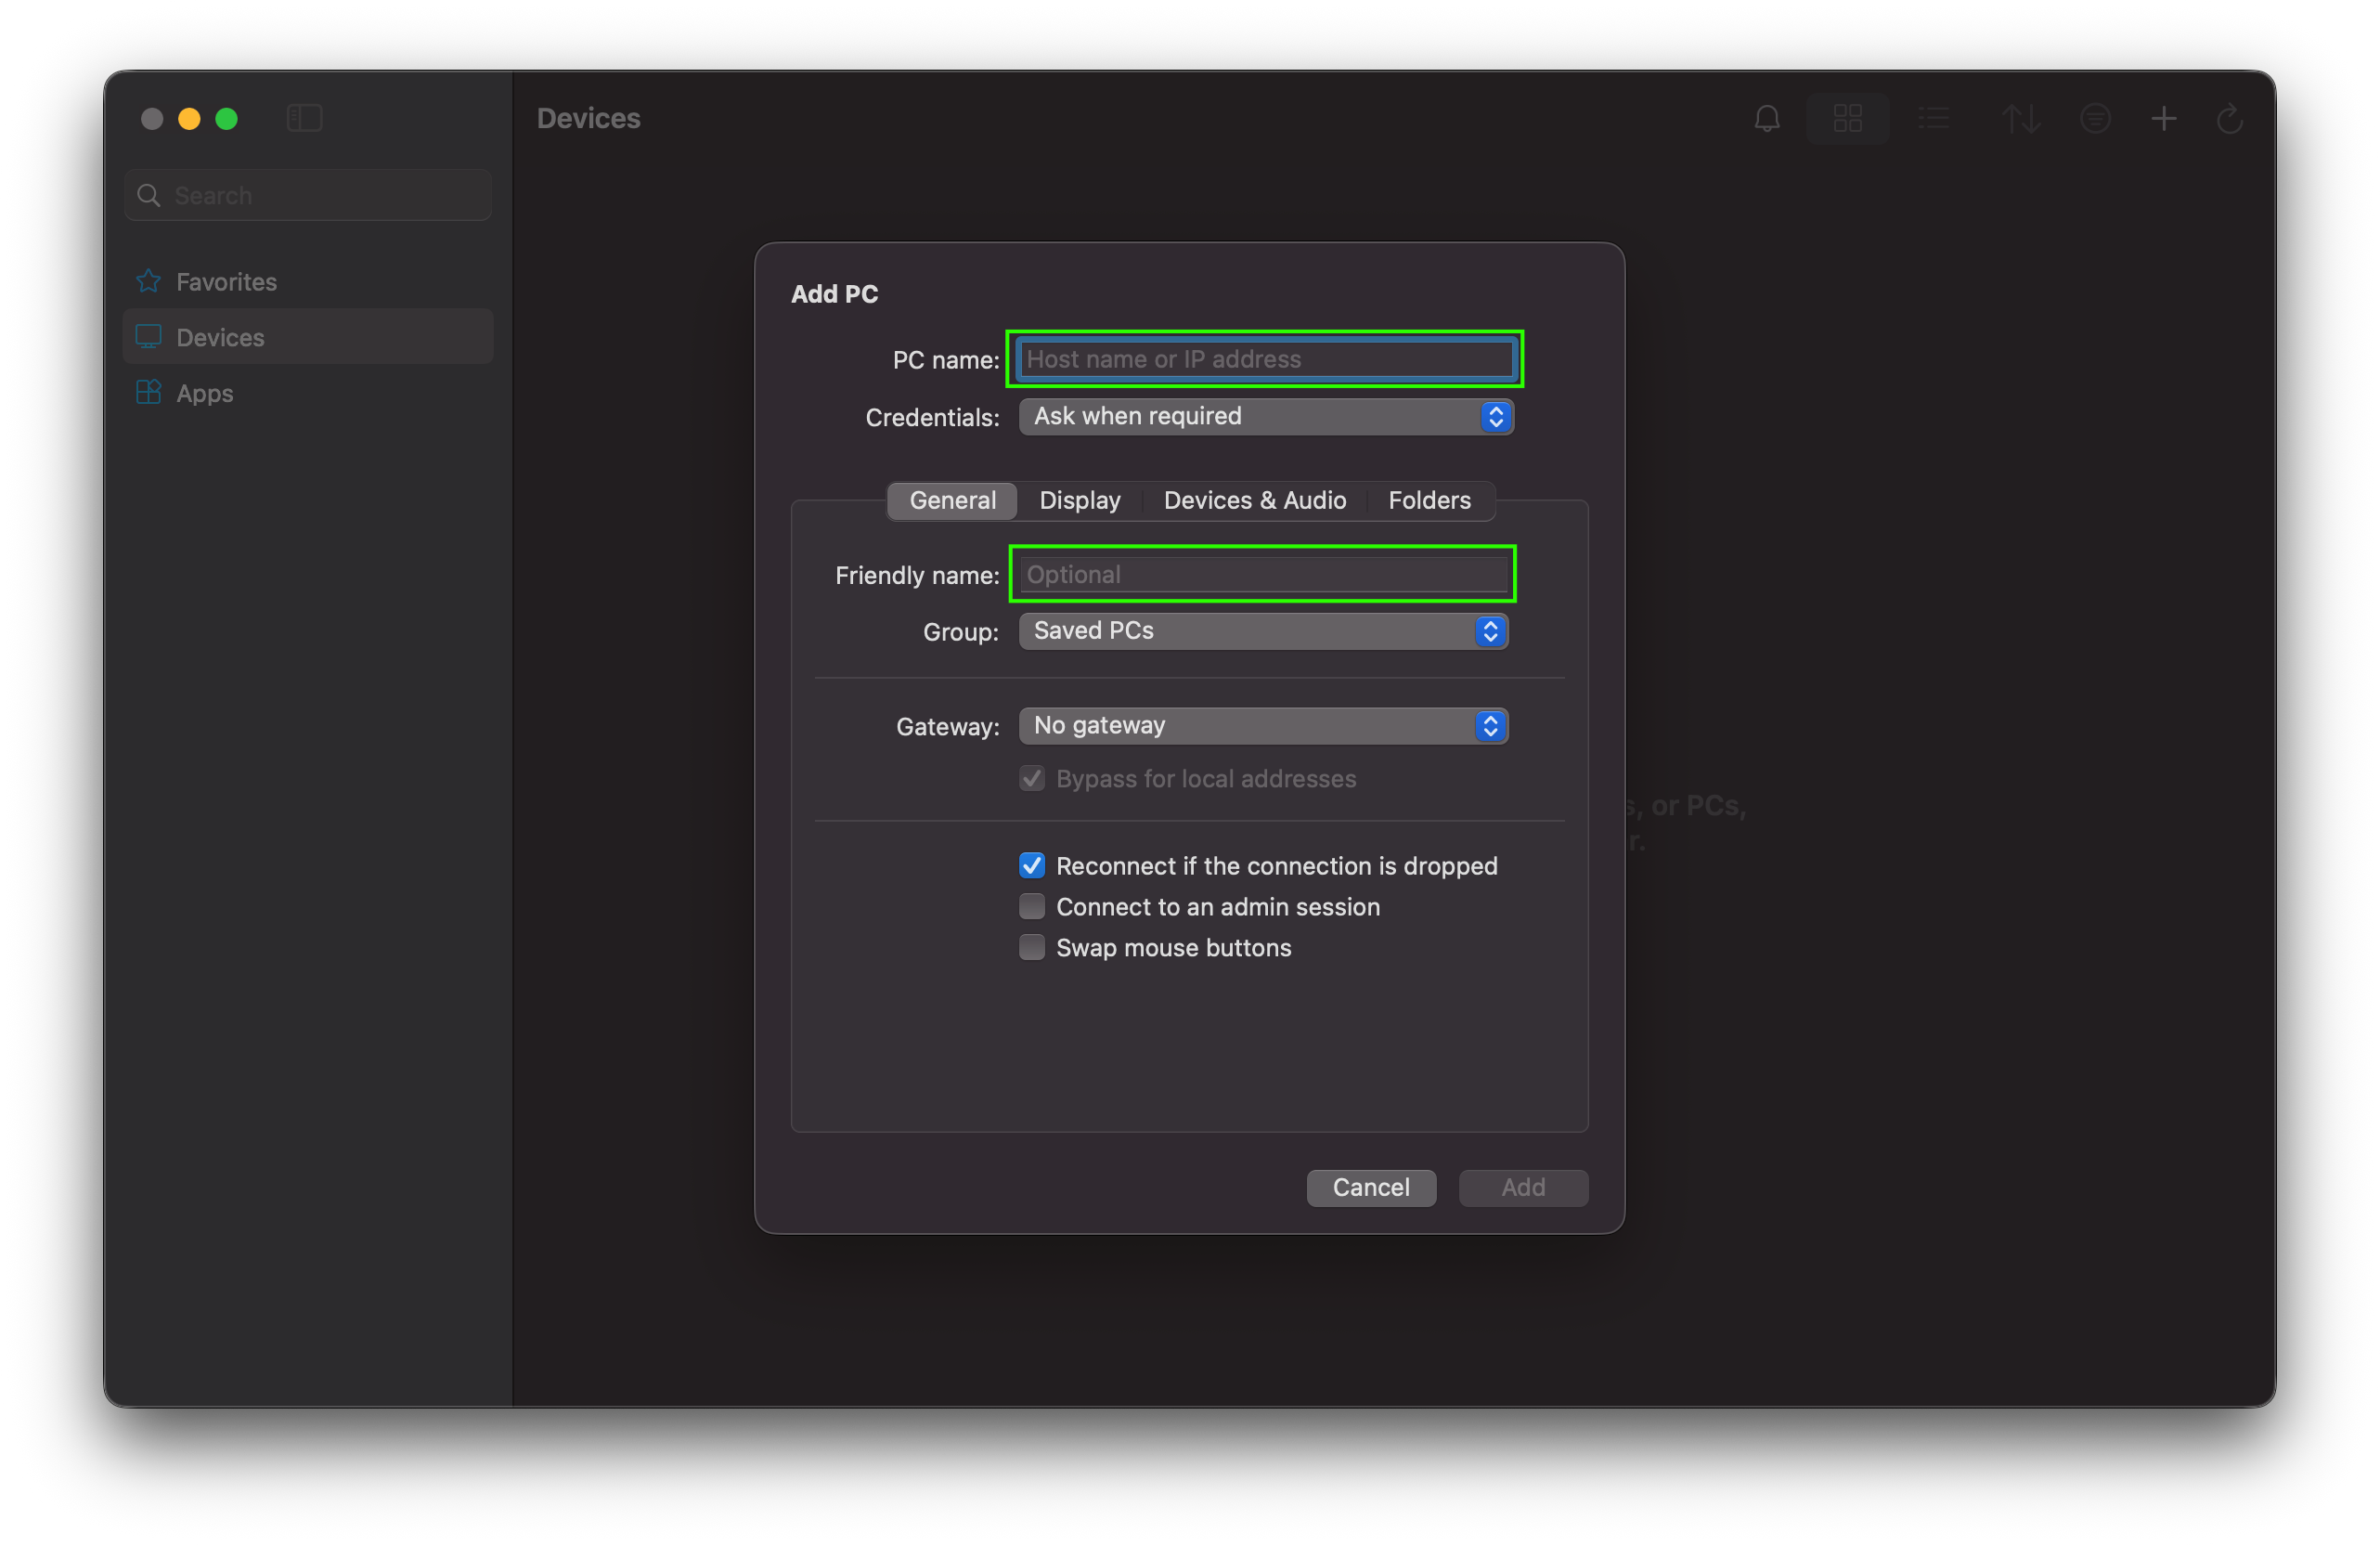
- Select
Addto save the connection.
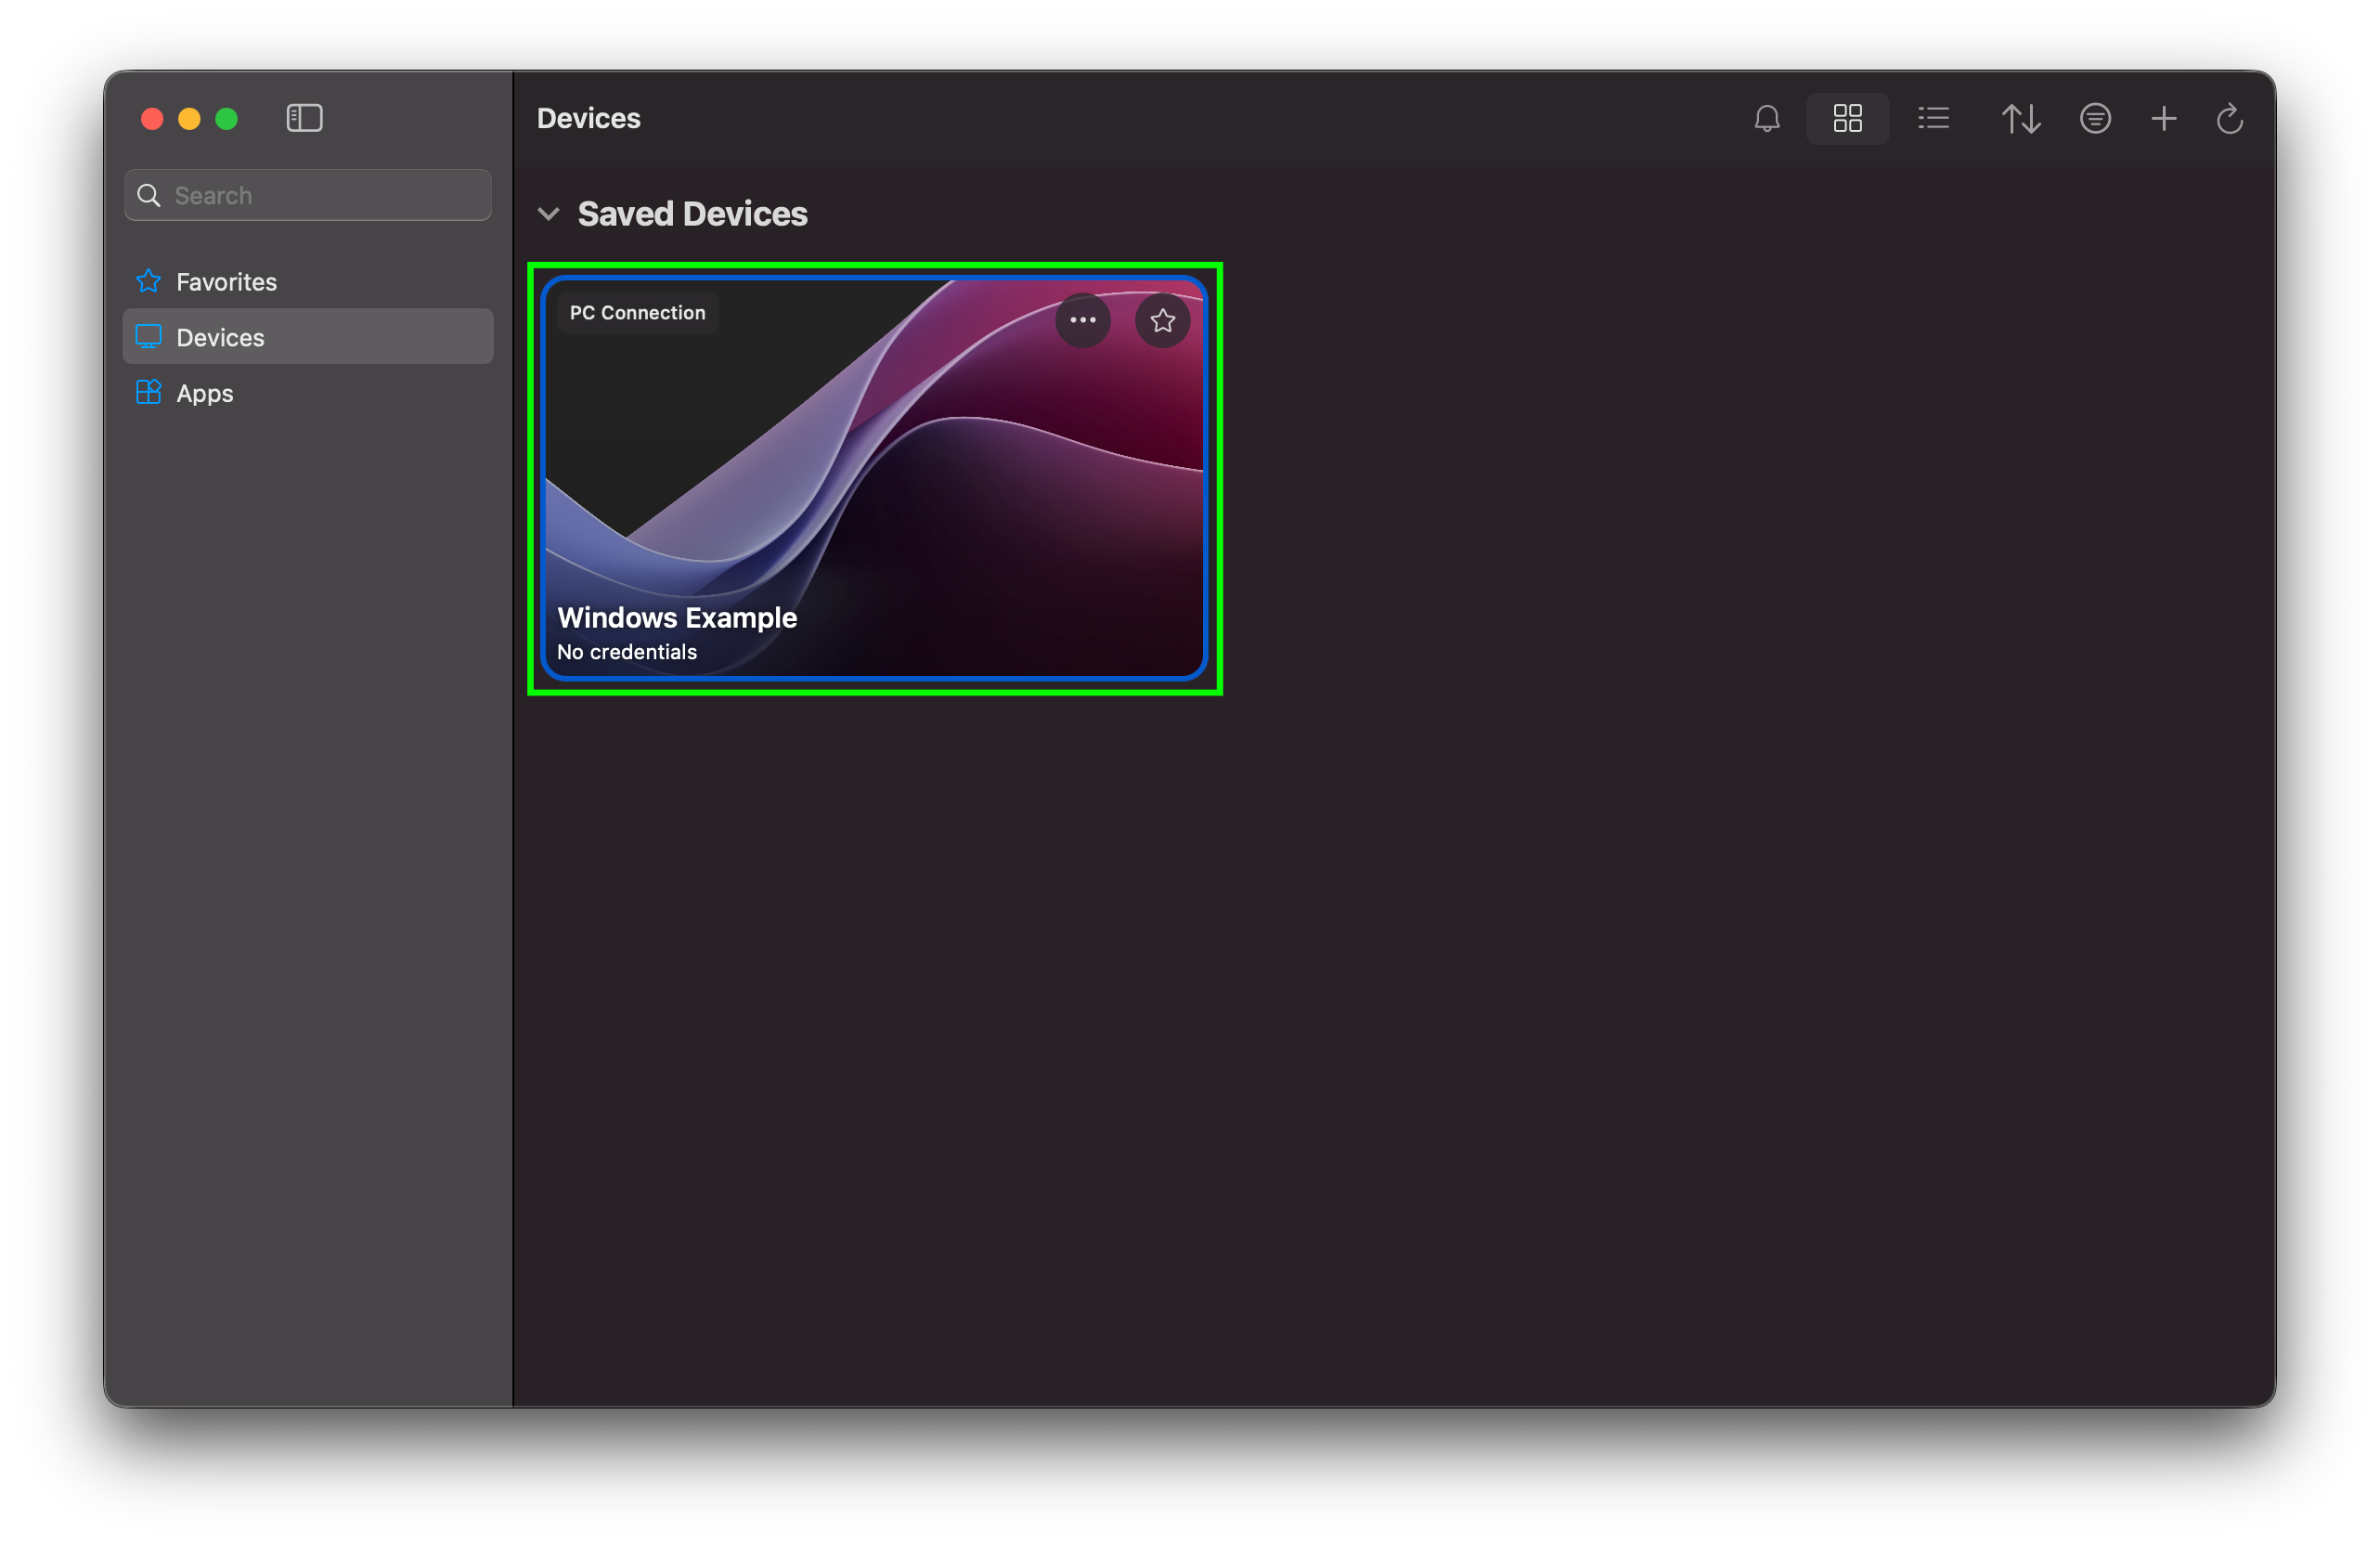
- Select the new connection with the friendly name you entered previously.
- In the
UsernameandPasswordfield enter in the username (likely "Administrator") and password you set for the instance earlier, and then selectContinue.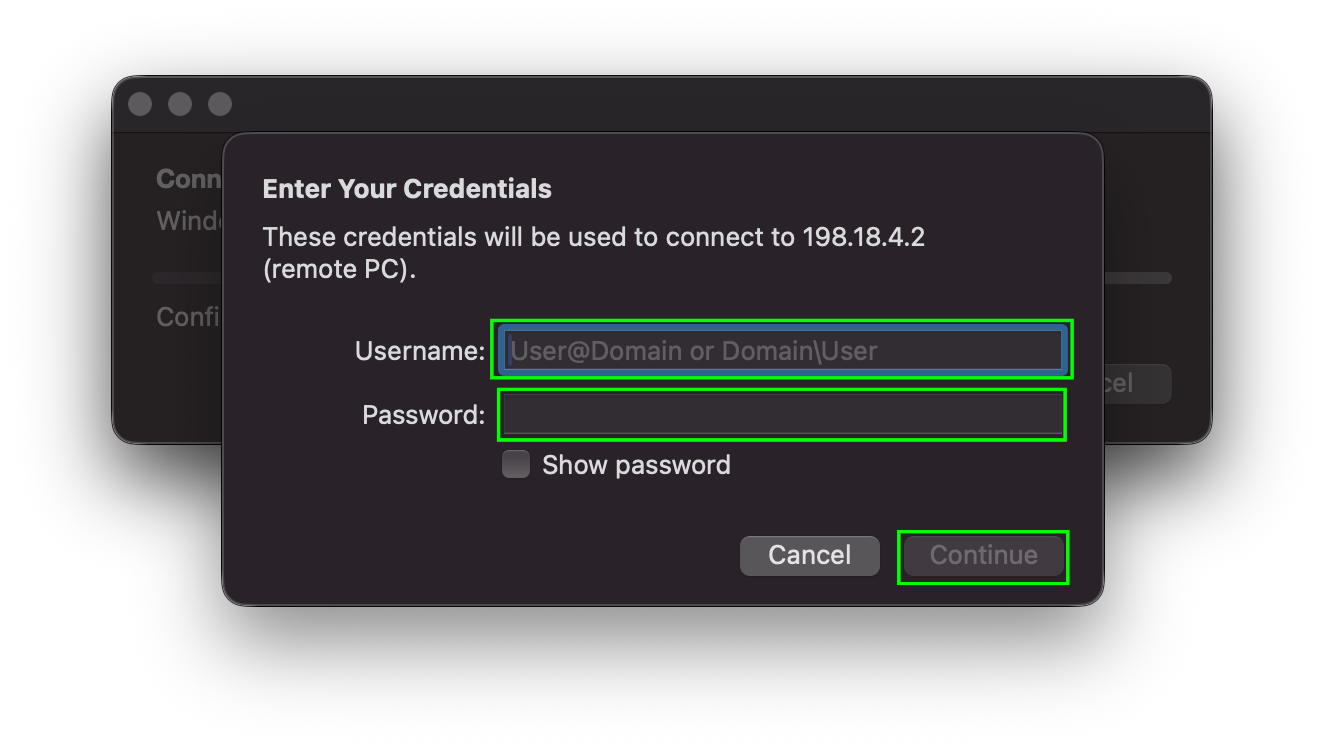
- When prompted to accept the server's certificate, select
Continue.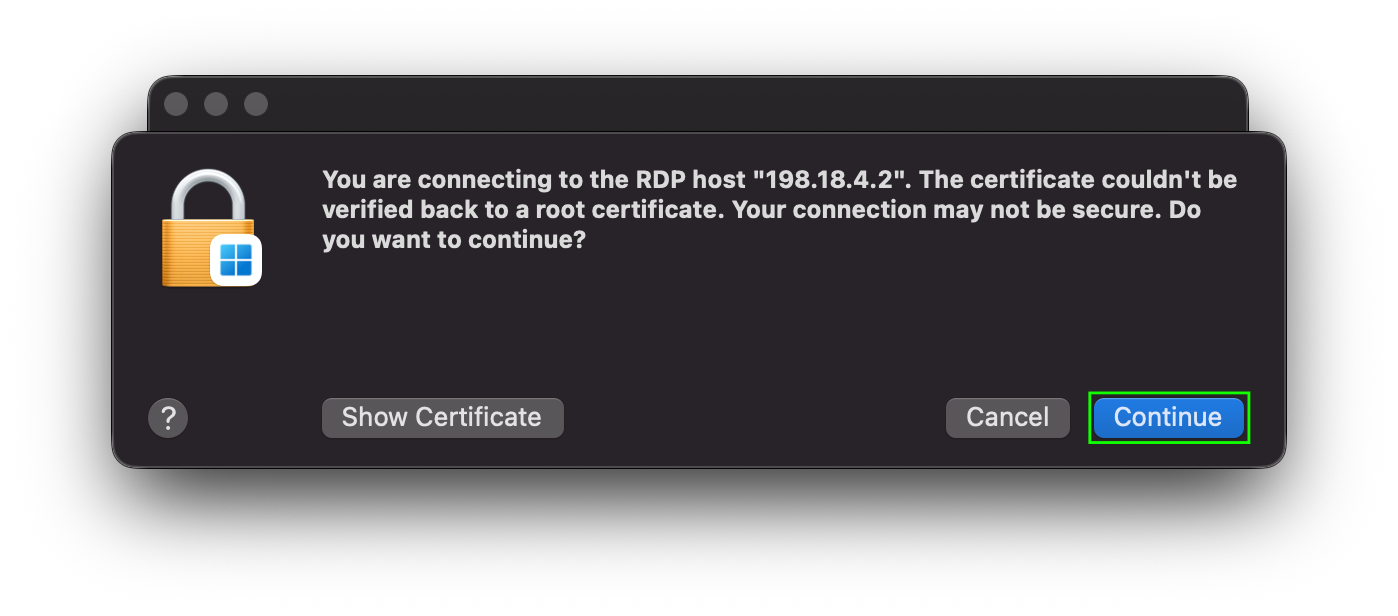
- You should now be logged in to the windows instance and be able to navigate as you would any windows device.